


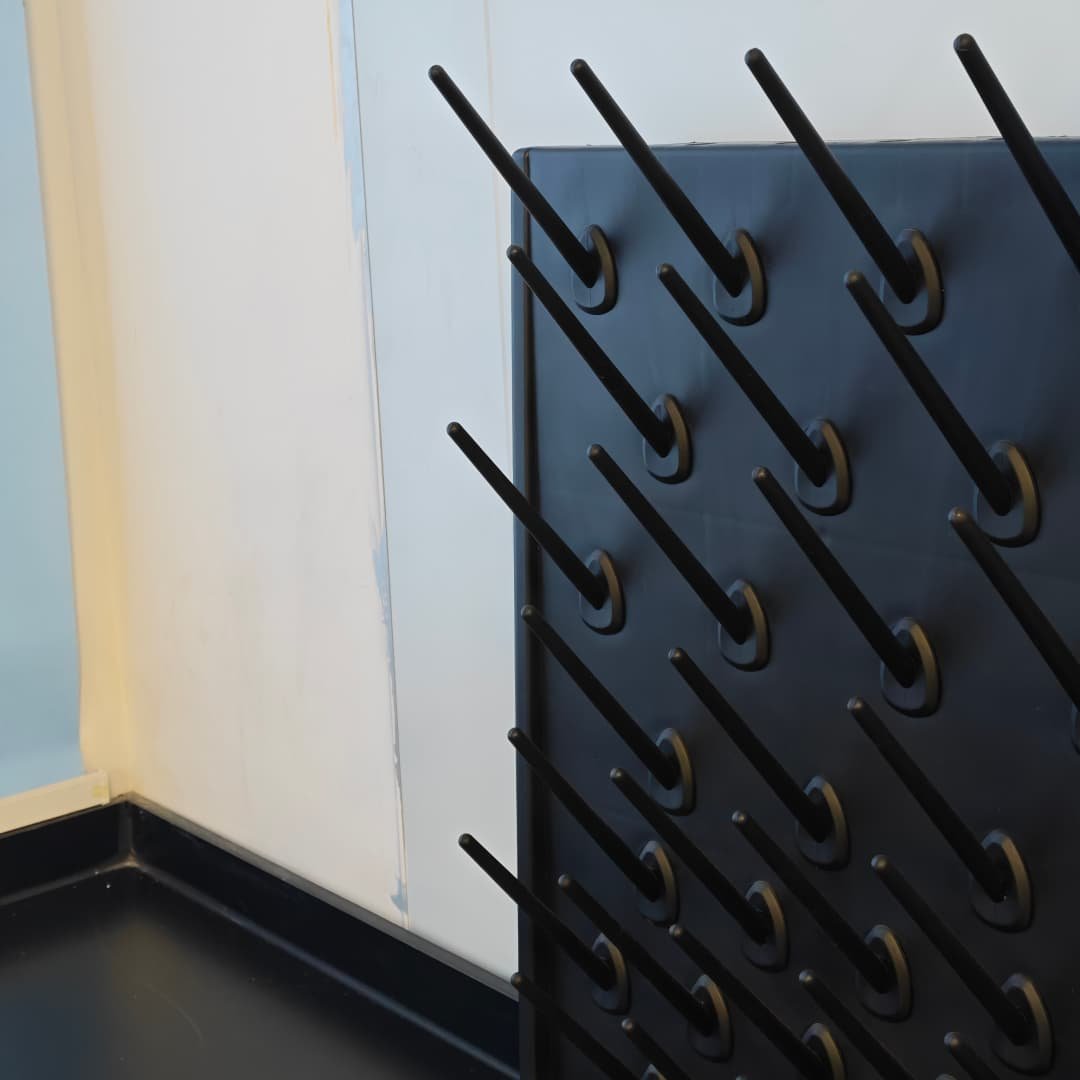
Description
Key Specifications and First Selection
A glassware drying rack is an open laboratory draining device, not a heating cabinet or an enclosed storage unit. Washed vessels are placed inverted on pegs or wire supports, liquid drains by gravity, and the remaining moisture dries in ambient air. The first selection is therefore the glassware list: vessel mouth diameter, body diameter, height, mass, shape and the number that must dry at the same time. The rack material, peg layout, mounting position and drainage method follow from that list.
Capacity Labels Do Not Mean the Same Thing
Slots, pegs, places and maximum pieces are different fields. A panel may have 52 slots but be delivered with 56 pegs in more than one length. A stainless wire rack may list 55 drying places divided between smaller and larger positions. Another rack may list 70 pegs, while a compact configuration may be described as 27 pegs. These numbers cannot be compared as one continuous capacity scale without checking the peg length, vessel size, spacing and approved support arrangement.
Separate Reference Configurations
| Reference configuration | Independent published field set | Installation form | Drainage approach |
|---|---|---|---|
| PP single board | 700 x 550 x 120 mm; 52 slots; 56 supplied 120/140 mm pegs | Wall-mounted | Drain hole with 1 m hose reference |
| PP double-sided assembly | 550 x 700 x 280 mm reference | Benchtop, defined two-panel structure | Selected connectors and drain route |
| Stainless wire rack | 360 x 160 x 650 mm; 55 places split 50 small/5 large | Wall or benchtop | Removable drip tray reference |
| PP wall rack | 400 x 600 mm; 70 removable pegs at least 80 mm long | Wall-mounted | Final collection arrangement to be confirmed |
These are separate configuration examples, not one standard product series. The final rack schedule should identify the exact panel or wire structure, material, external dimensions, peg fields, installation hardware and drainage components.
Product Scope and Supply Boundary
This product family covers an open laboratory rack for draining and ambient-air drying washed glassware. It can be configured as a PP pegboard, a stainless steel glassware drying rack with panel or wire construction, or another confirmed rack material. The selected scope may include the panel or frame, pegs, drip tray or trough, drain hole, hose, wall or bench mounting parts and a defined double-sided connection arrangement.
What This Product Does Not Replace
A lab drying rack does not actively heat glassware, filter air, control temperature or verify a defined drying time. It does not sterilize vessels or guarantee a water-spot-free, particle-controlled or residue-controlled outcome. Where a process requires forced drying, controlled air, enclosed storage or thermal treatment, select a different equipment type and define the process requirement separately.
Confirm Accessories as Individual Items
Pegs, drip trays, hoses, drain connectors, slot covers, wall fasteners and double-sided brackets may be supplied differently by configuration. A product image can show a complete arrangement without proving that every visible component is part of every order. The approved configuration should state the number and lengths of pegs, whether they are removable, the collection method below the rack and the exact mounting hardware required for the installation surface.
Rack Configurations and Installation Forms
A laboratory pegboard drying rack uses a panel with arranged peg locations. It is commonly selected where a defined peg pattern, removable pegs and a lower drip channel are required. A stainless wire rack uses a formed metal structure and may provide a mixture of smaller and larger drying positions. Both can support open gravity drainage, but their cleaning access, mounting route, peg material and drainage components must be confirmed independently.
Wall-Mounted, Benchtop and Double-Sided Forms
A wall mounted lab drying rack keeps draining glassware above a selected sink or counter and frees the work surface below. A benchtop rack requires a stable base and a defined route for collected water. A double-sided arrangement may use two panels with matching connectors, but two separate wall boards should not simply be placed back-to-back without the designed support and drainage arrangement. Confirm the access side, usable depth, mounting height and the location of the receiving sink or tray.
Put the Rack Where Drips Can Be Managed
The rack should be located so that drained liquid reaches the intended collection point rather than cabinets, electrical outlets, walkways or unrelated equipment. A wall-side wet-work zone can be planned with a Laboratory Wall Bench. A double-sided or central arrangement can be coordinated with a Laboratory Island Bench. The support surface and the drain path should be considered before the mounting pattern is fixed.
Keep the Loading Zone Clear
The available space in front of the rack matters as much as the panel width. Operators need room to invert glassware without striking adjacent vessels, remove a large flask without catching a longer peg, and reach the lower collection area for cleaning. A wall-mounted board placed too close to a high backsplash or upper cabinet can make the upper rows difficult to use. A benchtop double-sided board can reduce the usable depth of a work surface if its central support and loaded vessels are not included in the layout drawing.
When a rack is placed above a sink, confirm that the longest loaded vessel remains clear of the faucet, splash panel and bowl rim. When it is placed beside a sink, confirm that the tray or hose can drain without crossing the normal work zone. These checks are particularly important where the rack is used at a shared wash area, because one user loading glassware should not prevent another user from rinsing or accessing the sink.
Peg Count, Length and Glassware Layout
The peg layout controls whether a rack can drain the actual vessels without contact, crowding or unstable support. Select peg length, diameter, angle, spacing and the pattern of long and short pegs from the glassware list. Flasks, beakers, bottles, measuring cylinders and larger containers do not use the same support envelope. More pegs do not automatically provide more usable drying capacity if the vessels touch or their centres of gravity project too far from the panel.
Peg Projection and Panel Relationship
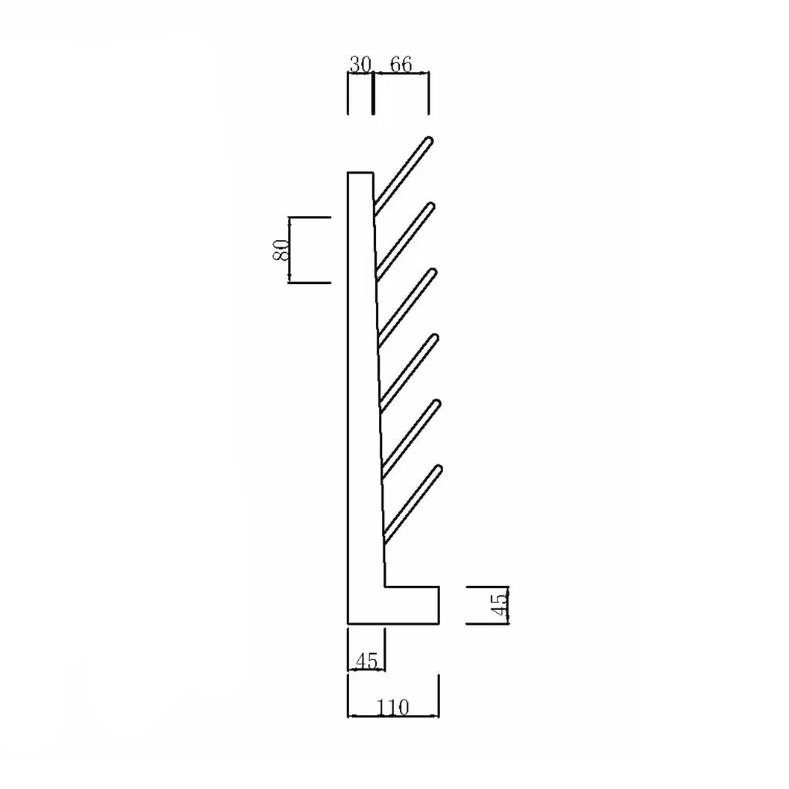
The figure shows why a peg length should not be selected from vessel height alone. The vessel mouth, body diameter and shoulder shape affect how far it sits from the panel. The rack also needs enough spacing to prevent glassware from touching while allowing drained water to reach the lower collection area. Confirm the selected peg drawing rather than assigning the dimensions shown here to every rack.
Fixed, Removable and Mixed-Length Pegs
Removable pegs allow the pattern to be adapted for different vessel shapes and make the panel easier to clean. A mixed-length layout can reserve longer supports for deeper flasks or bottles while retaining shorter positions for smaller glassware. The final layout should identify the number of each peg type, the locking or retention method where used, and whether unused slots require covers. This turns a broad “custom rack” request into a usable configuration.
Build the Layout from the Largest and Heaviest Pieces First
Start with the vessels that create the greatest projection and load on the rack: large flasks, bottles, cylinders or long-necked items. Allocate their peg positions first, keeping enough space around each item for loading and drainage. Smaller beakers, tubes and light containers can then occupy the remaining positions. This sequence is more reliable than filling every visible hole and discovering that the largest items cannot be supported without contacting adjacent glassware.
The orientation matters as well. An inverted vessel should drain without trapping a rim against the peg base, but its shoulder and body should remain stable enough that it does not rotate or slide during normal handling. If a vessel has an unusual opening, narrow neck or asymmetric body, provide a drawing or sample dimensions. The selected peg length and angle can then be checked against the actual geometry rather than assumed from a generic laboratory container.
Treat Spare Pegs and Slot Covers as Service Items
Where a rack uses removable pegs, spare pegs and covers can be useful for maintaining a clean, complete layout after routine changes or accidental damage. Their presence, material and quantity should be listed separately from the primary drying capacity. A peg supplied as a replacement is not another simultaneous drying location, and a covered slot is not an active support position. Keeping those fields separate prevents the rack from being overspecified by counting every accessory as capacity.
Drip Collection and Drainage Arrangement
An open drying rack must have a defined route for water leaving the inverted glassware. A laboratory drying rack with drip tray collects water below the pegs and requires a tray that can be removed, emptied or connected to a selected drainage route. A lower trough can direct water to a drain hole. A deflector can guide drips toward a separate sink or collection area. These are different arrangements and should not be described as interchangeable standard features.
Drainage Detail Must Match the Rack Form
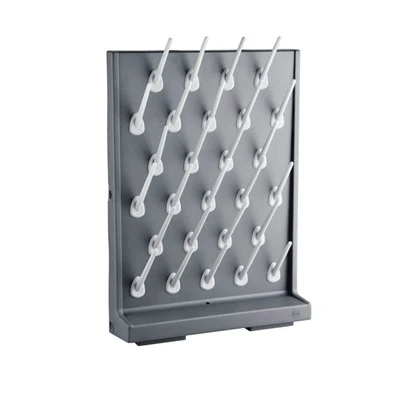
For a wall-mounted rack, confirm what lies below the collection point: a PP Laboratory Sink, a Stainless Steel Laboratory Sink, a drainboard or a separate collection tray. For a benchtop rack, confirm the tray capacity, removal route and whether a hose is required. A hose route should not trap water through reverse fall, sharp bends or an inaccessible outlet.
Drip Management Is Also a Layout Decision
The lower collection area needs to be sized and positioned for the likely drainage volume and the available cleaning method. If the rack is installed near cabinets or electrical equipment, ensure that incidental drips cannot enter those areas during normal loading or tray removal. The page does not assign a universal drain capacity because the tray, trough, vessel count and process vary by selected configuration.
Consider What Reaches the Collection Point
Water is not necessarily the only liquid present after washing. Rinse-water quality, cleaning-agent residue and the process used before glassware is placed on the rack can influence the required collection and cleaning procedure. The rack itself should not be represented as a waste-treatment device. Where the drained liquid needs controlled disposal, identify the applicable site route and select the tray, trough, hose or sink interface accordingly.
A removable tray is useful only when it can be removed and emptied without passing through a congested work area. A hose is useful only when its outlet remains accessible and has an appropriate route. A trough is useful only when the joint between the rack and the lower collection channel can be cleaned. These are practical configuration checks that should be made before ordering, not after a wall pattern or bench location has been fixed.
Drainage Items to Confirm
| Drainage field | Options to identify | Why it affects the rack | Required project input |
|---|---|---|---|
| Collection method | Removable drip tray, trough, deflector or drain hole | Determines where drained liquid is retained or directed | Required collection and emptying approach |
| Outlet route | No outlet, drain hole, hose or direct sink relationship | Controls routing and cleaning access | Receiving location and any hose direction |
| Rack position | Wall, bench, single-sided or double-sided | Changes drip path and lower clearance | Installation elevation and nearby wet area |
| Maintenance access | Tray removal, trough cleaning and hose access | Prevents retained water and inaccessible cleaning | Available clearance and cleaning procedure |
Material, Cleaning and Application Boundaries
PP, stainless steel and selected epoxy-panel constructions are different rack materials. A polypropylene glassware drying rack may use a molded or panel-based pegboard with selected plastic pegs and lower drainage features. A stainless steel glassware drying rack may use a panel or wire-rack construction and can use protected or polymer contact surfaces. The material of the panel or frame does not automatically identify the material of the pegs, tray, hose, fasteners or wall hardware.
Choose the Material from the Actual Cleaning Environment
Specify the cleaning agents, residues, temperature, frequency of use and the required method for removing pegs or trays. These conditions should be checked against the selected panel, pegs, drip components and mounting hardware. Do not make a broad chemical-resistance claim from a general PP, stainless or epoxy material label. The relevant question is whether each selected component suits the actual cleaning and drainage conditions.
Ambient Draining Has Practical Limits
The rack is intended to support gravity drainage and ambient-air drying. It does not heat vessels, force air through them, filter the air, verify dryness or sterilize glassware. If a process needs a defined moisture level, a controlled drying time, low-particle conditions or a specific sanitation result, those requirements need a separate process and equipment decision.
Keep Contact Areas Cleanable
The peg bases, panel face, lower tray or trough and outlet route should be accessible for routine cleaning. Removable pegs can help clean the panel and change the layout, but the selected retention design must be confirmed. Where a rack holds items that have contacted a particular reagent or cleaning solution, the process owner should define the cleaning sequence before the rack material and drainage route are finalized.
Material Choice Should Follow the Whole Assembly
For a PP rack, confirm the panel, peg, trough, hose and any mounting hardware that will actually be supplied. For a stainless design, confirm whether the description refers to a wire rack, a panel, a frame or only a selected component. For an epoxy-panel option, confirm the panel thickness, peg material and drip-tray interface. This prevents a general material word from being applied to parts with different exposure conditions or maintenance needs.
Colour can also be a configuration field. Black, grey, white and selected custom finishes may appear in different rack constructions, but colour should be confirmed with the material and the exact form rather than chosen from an unrelated product image. The selected surface should be assessed for visibility of residues, cleaning routine and the appearance required for the installed laboratory area.
Installation, Maintenance and Site Coordination
Install a wall-mounted drying rack only on a support surface and with a fastening arrangement suitable for the selected rack and its intended loaded condition. Confirm the wall material, anchor positions, mounting height, rack projection, clearance below the drip point and the route to the sink or collection area. For a bench-mounted or double-sided rack, confirm the base, connector arrangement, worktop depth and access from each loading side before assembly.
Maintain the Rack as an Open Wet-Work Component
Inspect the peg retention, panel or wire structure, tray or trough, drain outlet and hose route as part of the normal wet-area maintenance routine. Remove vessels carefully so their bases do not strike adjacent pegs. Clean the collection area before residues dry in the lower channel. A rack may look clear from the front while the tray, outlet or wall joint remains inaccessible, so access should be tested during installation.
Before routine use, place representative empty vessels on the selected peg layout and confirm that the loaded items clear the wall, top, faucet and one another. Check that water will enter the intended collection path, that any tray can be removed and that a hose or outlet remains visible for inspection. This simple physical check cannot replace a project acceptance procedure, but it identifies layout conflicts before the rack becomes part of the daily wash process.
Installation Inputs for a Project-Ready Configuration
| Installation input | Information to provide | Decision enabled | Avoided issue |
|---|---|---|---|
| Glassware list | Type, maximum diameter/height, mass and simultaneous quantity | Peg length, spacing and usable layout | Overcrowded or unstable vessel support |
| Rack form | Material, panel/wire structure, single/double sided and mounting type | Correct frame and installation method | Using wall hardware for an unsupported bench assembly |
| Drainage route | Tray/trough, hole, hose, receiving sink and outlet direction | Drip collection and cleaning access | Water entering cabinets, electrical areas or walkways |
| Site geometry | Wall or bench dimensions, mounting elevation and lower clearance | Correct rack position and fixing detail | Pegs or vessels conflicting with nearby equipment |
Applications, Related Products and Selection Boundary
Use a glassware drying rack after washing flasks, beakers, bottles, cylinders and other vessels that can be safely supported in an inverted position. Confirm the peg pattern against the actual glassware rather than assuming all vessels can share the same rack. A rack intended for bottles may need a different peg layout from one intended for larger flasks or small general glassware.
The product is best suited to workflows in which residual liquid can drain freely and the laboratory accepts ambient-air drying. It is not the right choice for sealed vessels that cannot be inverted, items whose geometry cannot be retained securely on the available pegs, or processes that require active temperature control, filtered drying air or a documented drying endpoint. Those boundaries help keep the selected rack aligned with the actual laboratory procedure.
Where several rack sizes appear suitable, select the smallest arrangement that still provides the required separation, access and drain collection for the normal daily load. An oversized panel with an undefined peg pattern can occupy valuable wall or bench space without improving the usable drying process for operators in daily practice.
After the drainage stage, dry items can be transferred to a selected PP Glassware Storage Cabinet where enclosed storage is required. That cabinet does not replace the open draining function of this product. Likewise, a glassware drying cabinet is a different product type where enclosed or active drying is required.
Frequently Asked Questions
Is a peg count the same as the number of pieces that can be dried?
No. Slots, supplied pegs, drying places and maximum pieces are different product fields. The actual simultaneous quantity depends on the selected peg geometry, vessel size, weight, spacing and arrangement. Provide the glassware list when confirming the layout.
Can the rack be installed above any worktop or sink?
The receiving wet area, wall or bench strength, mounting hardware, lower clearance and drainage route all need to be confirmed. A wall-mounted rack is usually coordinated above or beside a suitable collection point, but its final elevation and anchors depend on the selected rack and site construction.
Are drip tray and hose included?
They may be selected configuration items. Some rack forms use a removable tray, some a trough or drain hole, and others a hose or deflector. The approved scope should list the collection component and any hose or connector required.
Can the rack be used for sterilizing or heated drying?
No. This page covers open gravity drainage and ambient-air drying. It does not represent heated, forced-air, filtered-air or sterilization equipment.
Contact the Xicheng Engineering Team Today
Send the glassware list with maximum size and quantity, preferred PP, stainless steel or other confirmed material, wall or bench installation location, single/double-sided requirement, peg layout, drip collection method, drainage route, cleaning conditions, quantity and destination. The returned proposal can define the selected glassware drying rack configuration, component scope, installation interfaces and commercial pricing.
Shenzhen Office: No. 34 Zhenxing Road (Shengtaian Heavy Industrial Park B), Loucun, Guangming New Dist, Shenzhen, Guangdong, China
WhatsApp: +86 18126478161
Engineering Mailbox: fanalax34@gmail.com