


Description
Key Specifications and First Selection
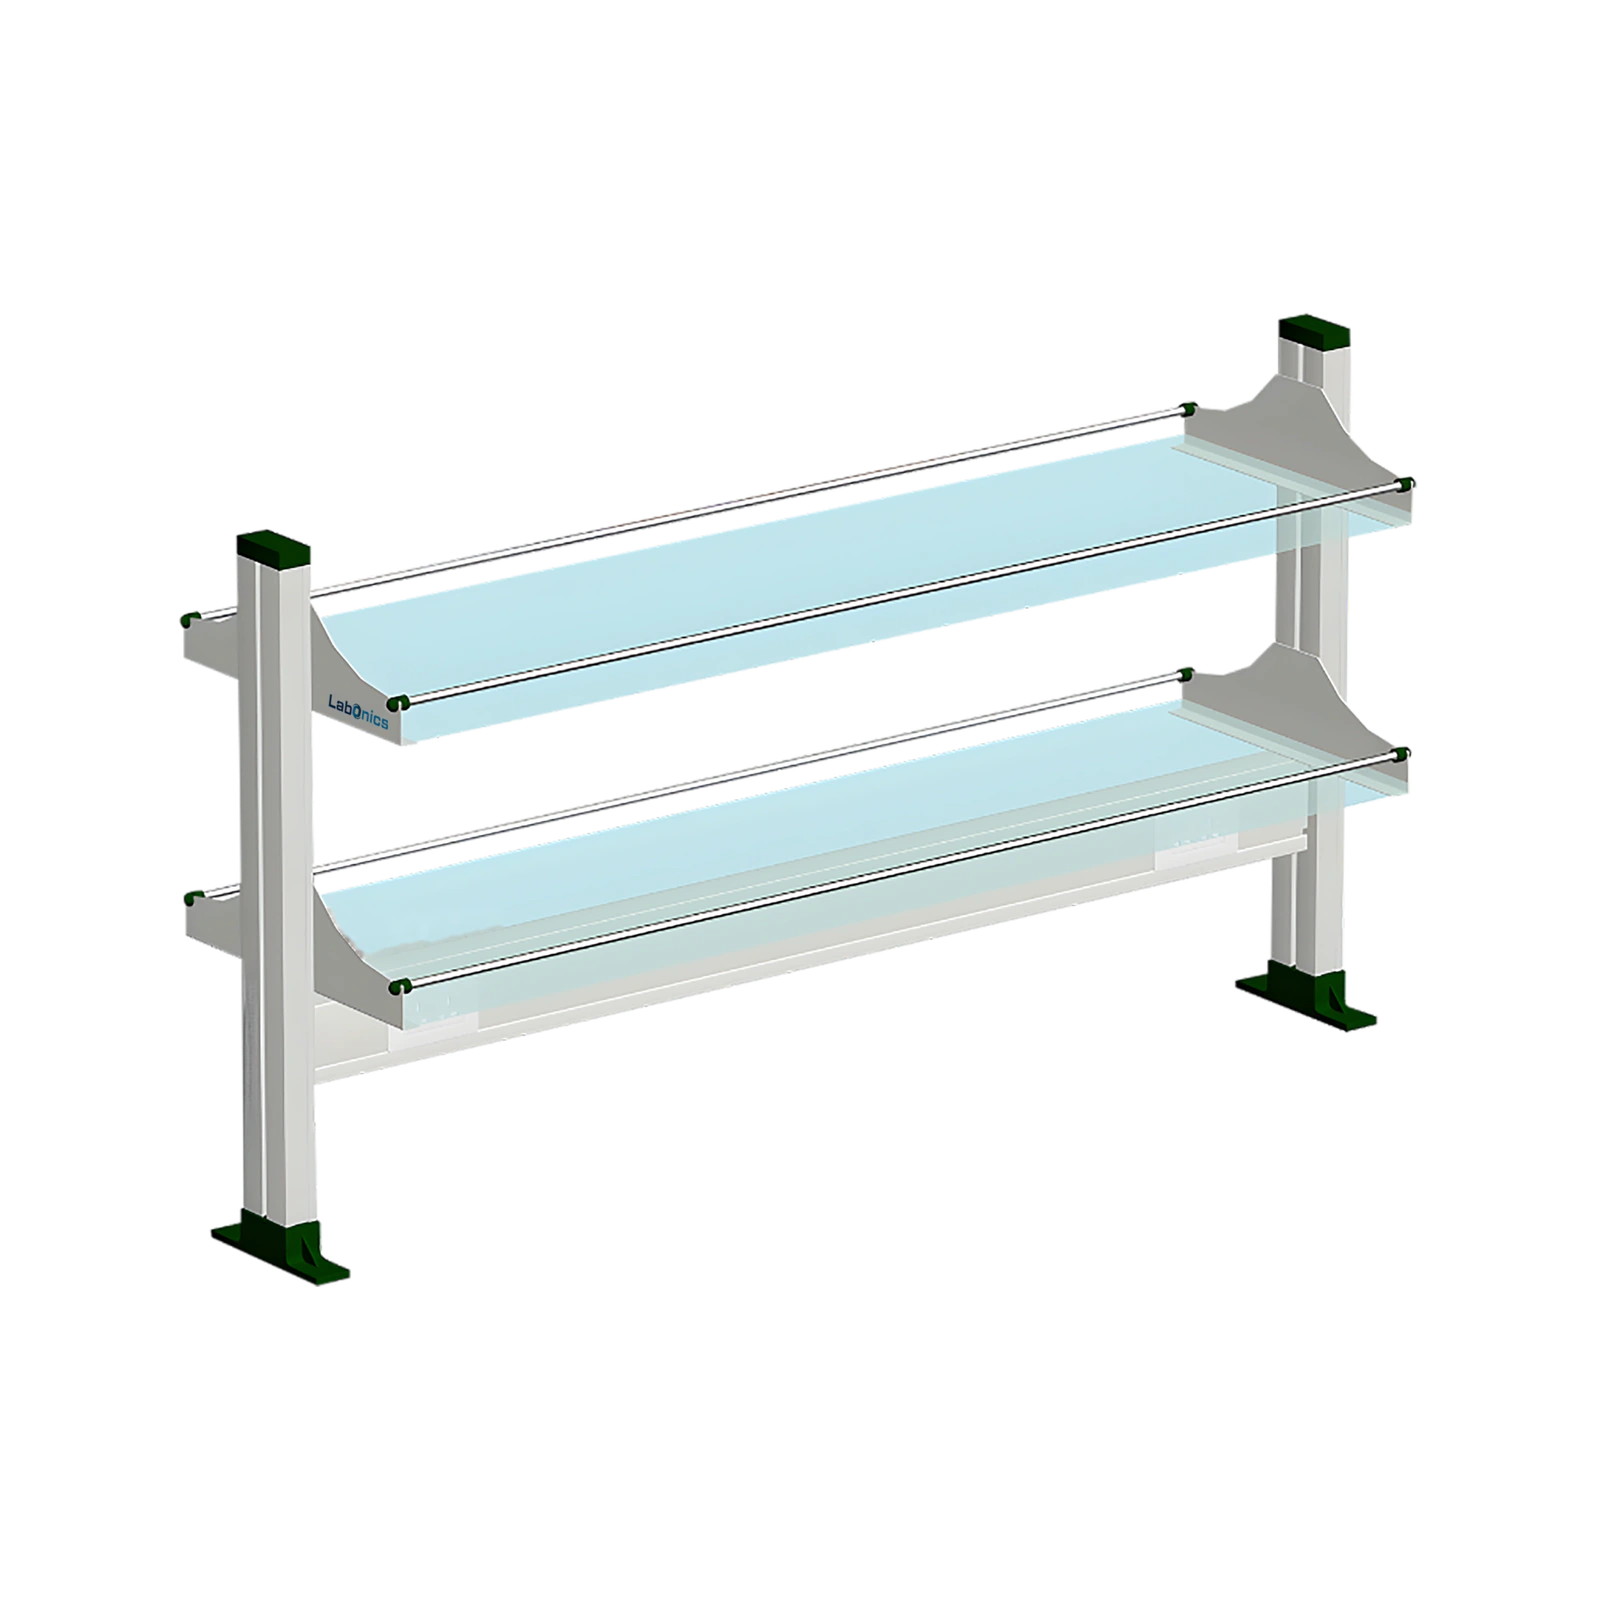
A laboratory reagent rack is an open, furniture-scale shelf system installed above a laboratory worktop. It keeps frequently used reagent bottles, glassware and light working items within reach without occupying the primary bench surface. The key buying decision is the rack’s relationship to the bench: a wall-side run normally needs one accessible face, while an island-bench arrangement may need two accessible faces. That choice changes the rack depth, upright arrangement, visual openness, access route and fixing plan.
This product family can be configured as a one-, two- or three-tier lab reagent rack with selected uprights, shelf materials, guard rails, service raceway and utility provisions. The finished length, shelf depth, clear height, number of supports and available bench space must be coordinated together. A long nominal rack is not automatically a long unsupported shelf, and a two-tier reagent shelf is not automatically appropriate for every bottle height or load case.
What the Product Is Intended to Do
- Provide open, above-bench storage for frequently used bottles, glassware and light laboratory items.
- Match one-sided wall-bench access or two-sided central-island access to the actual laboratory layout.
- Provide a selected shelf count, shelf material, upright arrangement and guard-edge treatment.
- Coordinate with the supporting Laboratory Wall Bench or Laboratory Island Bench, rather than replace the complete bench and its services.
Reference Configuration Formats
| Reference format | Layout direction | Typical use in early planning | Confirm before production |
|---|---|---|---|
| 1500 x 300 x 750 mm two-tier concept | Single or double sided | Medium-length bench run with two accessible shelf levels | Shelf material, upright locations, clear height and fixing points |
| 3000 x 200 x 750 mm steel-frame concept | Bench mounted | Long, shallow display or frequently used bottle run | Support spacing, usable shelf length and actual load case |
| 300 mm deep x 750 mm high wall-bench format | One-sided perimeter bench | Wall-side reagent access above a worktop | Back clearance, wall conditions and one-sided reach |
| 300/350 mm deep x 750/800 mm high island format | Double-sided central bench | Shared access from both sides of a laboratory island | Overall depth, center of gravity, guard rails and service route |
These are independent planning references, not a combined standard specification. A custom laboratory reagent rack is selected from the working length, bottle dimensions, shelf arrangement, bench structure, service requirements and installation drawing.
Product Scope and Storage Boundary
This page covers an open laboratory reagent shelf system above a worktop. The normal scope is the selected rack structure: uprights, brackets, shelf supports, shelves, guard rails and the approved interface to the bench. Electrical outlets, lighting, cable raceways, gas or vacuum points can be selected where a project requires them, but their equipment, voltage, wiring, grounding, connection and certification scope must be stated on the order rather than assumed from a product image.
What Is Not Included by the Product Name
A laboratory reagent rack does not automatically include the laboratory bench, countertop, sink, fume hood, extraction arm, bottles, chemicals, electrical distribution or site installation. It is also different from a test-tube holder, a Glassware Drying Rack, a chemical storage cabinet and an enclosed safety cabinet. The open shelf is intended for accessible working storage; it does not establish containment, fire protection or suitability for hazardous chemical storage.
Storage Boundary Comes Before Shelf Layout
Before shelf count or finish is selected, identify the item types that will stand on the rack. Bottle diameter and height, container mass, label visibility, frequency of use and the need for a guard edge all influence the shelf arrangement. A high bottle may need one open tier rather than two closely spaced levels. A tray or raised edge may suit some working items, but it does not make the rack a secondary-containment system. Where a chemical requires controlled or segregated storage, the project should select an appropriate enclosed product rather than treating the open rack as a substitute.
Establish a Clear Service Scope
An outlet aperture, a mounted outlet assembly and a complete wired power system are different supply scopes. The same distinction applies to lighting and utility points. State whether the rack carries only prepared openings, selected devices without internal wiring, or a defined factory wiring package. This allows the electrical design and the bench structure to be checked without overstating what the shelf system supplies.
Wall-Bench and Island-Bench Arrangement
The rack orientation is a practical selection decision. A wall-bench reagent rack normally presents the shelves to one working side and can retain more depth for the user-facing shelf arrangement. An island bench reagent rack has users on both sides, so the rack must distribute shelf depth, upright positions, guard protection and visual obstruction across the central bench. The chosen configuration should be shown on an elevation and plan, not inferred from a general rack name.
One-Sided Wall-Bench Reagent Rack
A bench mounted reagent rack on a perimeter bench is suitable where the user works from one side and the rear of the rack faces a wall, backsplash or service zone. Check the available distance between the worktop and any wall-mounted service, shelf, cabinet or fume-extraction component. The front of the shelf should remain reachable without forcing the user to lean across instruments or open containers. A wall-side layout may also require a defined route for cable raceway, utility drops or rear fixing points.
Double-Sided Island Reagent Rack
A double sided laboratory reagent rack can improve access from both sides of a central run, but it needs a separate depth and stability review. The total rack depth, the effective reach to each shelf, bottle restraint and the position of services must be balanced against the usable worktop area below. An island rack should not be selected by mirroring a wall-bench shelf arrangement without checking its support and clearance conditions.
Decide the Shelf Count from the Items, Not the Photograph
One tier can preserve open sightlines and accommodate taller containers. Two tiers are a common way to increase accessible storage for lower bottles and glassware. Three tiers may suit a selected configuration when the available height, reach and support arrangement permit it. The project drawing should record the usable shelf height and depth at every tier, not just the overall rack height.
For a wall-bench layout, the drawing needs the bench elevation, rear clearance and available fixing zone. For an island layout, it also needs the total rack depth, usable access from both sides, guard-edge arrangement and center support layout. A one-tier rack should be selected when vertical access or sightlines have priority. A two- or three-tier rack should be selected only after confirming that each level retains enough clear height, effective shelf depth and practical reach for the bottles it will hold.
Check Working Clearance Above and Below the Rack
The gap from worktop to the first shelf affects both the work surface and the user’s ability to operate equipment below the rack. The clearance above the upper shelf affects whether containers can be removed without contacting lighting, ducts, shelves or service drops. These are not cosmetic dimensions. They determine whether an item can be placed and retrieved without moving other bottles, and whether the bench retains a safe visual field for day-to-day work. Record the largest items that will be used at the bench as well as the largest items intended for the shelf.
Treat Rack Depth as Usable Reach, Not Just Overall Geometry
The overall rack depth includes uprights, rails, brackets and the shelf itself. The usable depth for bottles can be smaller, particularly on a double-sided arrangement where each face must be accessible. Measure bottle diameter, label orientation and the required finger clearance at the front rail. This helps prevent an apparently generous shelf from becoming a row of difficult-to-reach containers after commissioning.
Shelf Materials, Guard Rails and Service Options
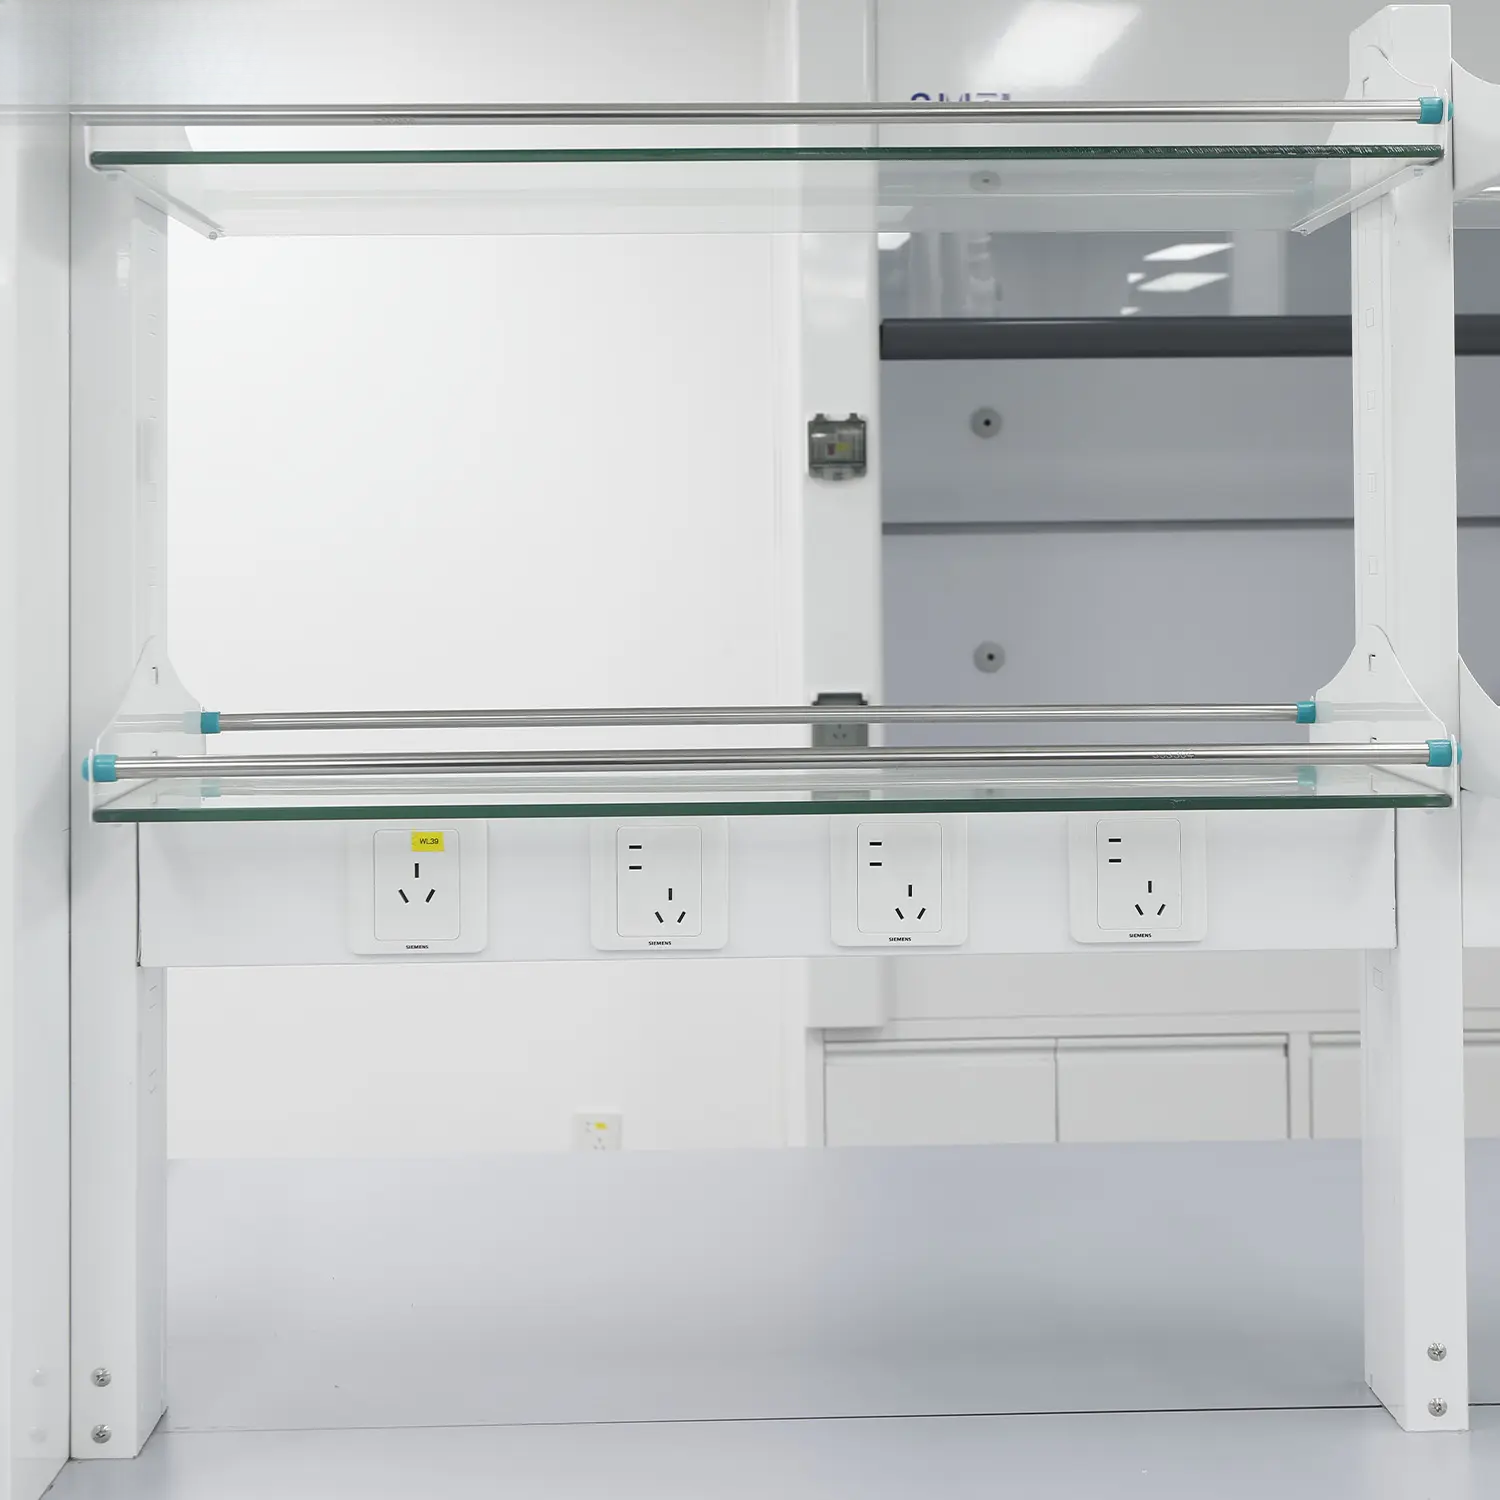
Shelf material is chosen for the selected rack, stored items and cleaning practice, not simply for appearance. Glass, powder-coated steel, stainless steel and resin or laminate shelf directions can all be evaluated, but each requires its own thickness, edge treatment, span, support and load confirmation. A product-family description should not combine a glass specification from one configuration with a steel load value or stainless finish from another.
Shelf Material and Finish Direction
Glass shelves can provide visual openness and make the underside of stored containers easier to see. Steel or stainless shelves can support a tray-like or guard-edge arrangement when that is part of the selected design. Resin or laminate shelves may be chosen to coordinate with a particular Laboratory Countertop system. Final compatibility with the stored materials, cleaning agents and actual support span must be assessed for the selected configuration.
Guard Rails Are Retention Features, Not Containment Claims
A front rail or raised guard edge can help reduce accidental slide-off from a selected shelf. It must be selected with the bottle shape, shelf depth and access direction in mind. A guard rail does not provide a sealed tray, spill containment, seismic restraint or compliant hazardous-material storage. Do not use a guard rail as a reason to place unsuitable chemicals on an open laboratory reagent rack.
Utilities Require a Defined Scope
Where sockets, lighting or a raceway are selected, their positions should be set around actual equipment and user reach. The rack supplier and electrical designer need to agree whether the scope ends at a provision, a device, or a complete internal wiring package. Gas and vacuum openings also require their own service drawing; a hole in an upright does not establish a completed utility installation.
Plan for Labels, Cleaning and Daily Access
The shelf arrangement should let users read labels without removing every container in front of them. This may affect the selected shelf depth, bottle orientation, tier spacing and whether a transparent shelf is useful. Cleaning also has an interface dimension: the project should identify whether shelves are removed for cleaning, wiped in place, or protected from routine wash-down. Those decisions guide the selected shelf edge, rail attachment, joints and fasteners. They do not need to turn into broad resistance claims, but they should be decided before the rack is ordered.
Avoid Mixing Shelf Families in One Specification
Different shelf systems can look similar in a rendered image while using different supports, materials and fixing methods. Specify the upright family, bracket form, shelf material, finish, rail arrangement and intended span together. This prevents a procurement schedule from combining a long unsupported glass shelf, a heavy item load and an unrelated guard-edge design into a single ambiguous request. The final selection should always describe one coherent rack configuration.
Confirm These Material and Service Fields
| Selection field | Why it matters | Confirm from the project | Do not assume |
|---|---|---|---|
| Shelf material and finish | Affects cleaning, appearance and support construction | Glass, steel, stainless, resin or laminate direction | Thickness, grade, edge treatment or chemical performance |
| Shelf span and support | Controls deflection and load evaluation | Upright locations, brackets and usable shelf length | A generic rack load or maximum span |
| Guard rail or raised edge | Affects bottle retention and access | Height, opening and whether it is fitted on one or both faces | Spill containment or hazardous-storage suitability |
| Outlet, lighting or utility provision | Defines the service interface | Device count, position, voltage, wiring and site connection responsibility | Complete power, grounding or utility installation |
Bench Interface, Fixing and Installation Planning
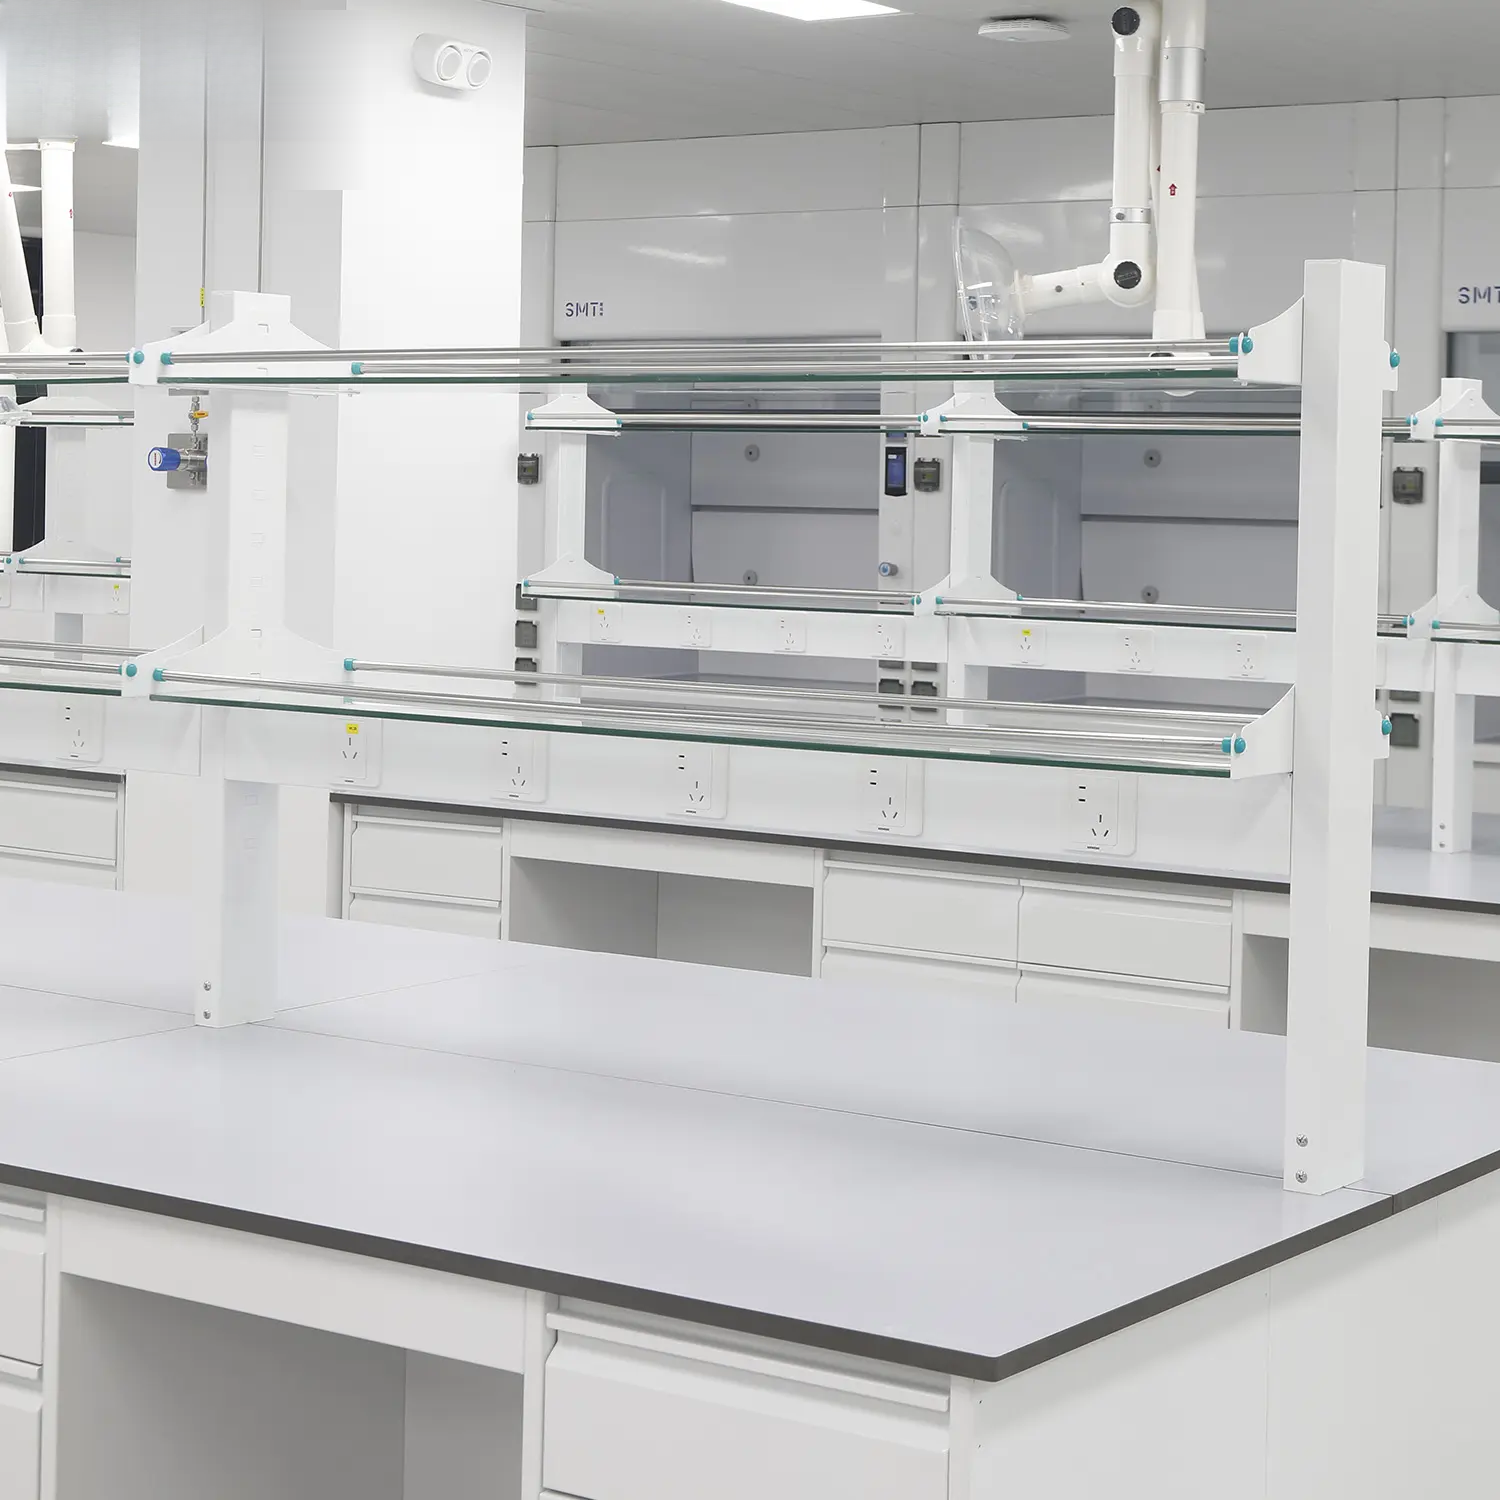
The bench and rack are one installed assembly even when listed as separate products. The rack must be fixed into a support arrangement that corresponds to the bench material, thickness, reinforcement, overall span and planned loading. Drilling a rack into a thin worktop skin without checking the structure beneath is not a substitute for a defined fixing plan. Long runs often need intermediate uprights or support positions, but the correct spacing comes from the selected configuration rather than a copied catalogue number.
Check the Whole Envelope
The installation drawing should show rack length, total depth, height above the worktop, tier spacing, upright locations, support/bracket geometry and the free space above the top shelf. It should also show neighboring cabinets, lighting, fume hoods, extraction equipment, wall shelves and service drops. A rack that appears to fit in a front elevation can conflict with a hood sash, a wall cabinet door or a service connection when viewed in plan.
Multi-Span Runs Need Deliberate Support Locations
For a long reagent shelf, distinguish total run length from individual unsupported shelf span. An intermediate upright may reduce the usable open shelf area but can be necessary for the selected design. The project should decide where bottles are placed, how they are accessed, and where supports can be positioned without interrupting essential bench work.
Installation Inputs for a Project Configuration
| Installation input | Why it affects the rack | Information to provide | Coordination output |
|---|---|---|---|
| Bench type and worktop construction | Establishes fixing method and available support | Bench model, top material, thickness and reinforcement | Fixing locations and support interface can be selected |
| Rack length and shelf arrangement | Sets uprights, spans and user access | Overall run, tier count, shelf depth and clear heights | Rack layout can be placed on the elevation and plan |
| Stored-item envelope | Determines usable heights and guard requirement | Largest bottle diameter/height, item mass and quantity | Shelf spacing and restraint approach can be checked |
| Service scope and overhead conditions | Prevents clashes with utilities and equipment | Outlet/lighting/utility needs, nearby services and overhead clearances | Service route and installation sequence can be defined |
Installation Is Not the Same as Site Acceptance
The mounting method, site assembly responsibility, final alignment and electrical connection scope should be stated in the order documents. Where outlets or lighting are selected, final commissioning belongs to the defined electrical work. The rack page explains the interface; it does not certify a completed laboratory installation.
Sequence the Rack with the Bench Package
In a new furniture installation, the rack should be scheduled alongside the bench, countertop, service raceway and overhead items instead of being added after the worktop is already fixed. Confirm the rack location before penetrations, backsplash work and electrical rough-in are finalized. In a refurbishment, measure the existing bench and check its construction before selecting a fixing method. The same visible rack can need a different support approach on a steel-framed bench, a resin worktop or an existing laminated surface.
Record Changes That Affect Future Expansion
If the customer expects a future extension, identify where an end upright, intermediate support or service raceway can continue. Adding another bay later is not guaranteed simply because there is empty bench length. The original fixing pattern, shelf direction, existing loads, service capacity and usable working space must be reviewed. Documenting those choices in the initial layout gives the project a controlled route for later changes.
Applications, Related Products and Selection Boundary
Laboratory reagent racks are appropriate for accessible working storage above analytical, teaching, quality-control and process-support benches where users repeatedly reach for labeled bottles and glassware. The rack can be configured for a wall-side workbench or a central island run and may be coordinated with selected power, lighting or utility interfaces. The product is not chosen to solve every storage need in the room; it serves the working zone directly above a bench.
Choose This Product Family When
- Frequently used bottles and light laboratory items need open, close-to-hand storage above a worktop.
- The layout has a confirmed wall-bench or island-bench position and a support path for the uprights.
- The team can define shelf count, bottle envelope, rack span, guard-edge need and required service interface.
- The stored items are appropriate for open working storage under the laboratory’s own storage and safety rules.
Related Product Boundaries
Use Laboratory Wall Bench content for a one-sided perimeter installation and Laboratory Island Bench content for double-sided central layouts. Laboratory Countertop content establishes the worktop material and fixing interface. Laboratory Base Cabinet content applies to the enclosed storage below the worktop. Each remains a separately selected product even when supplied in one laboratory furniture package.
Do Not Use It for These Jobs
Do not select this rack as a safety cabinet, a flammable-liquid cabinet, a corrosive-chemical cabinet, a test-tube holder, a warehouse rack or a glassware drying product. The open shelf does not prove chemical compatibility, spill containment, seismic restraint, fire resistance or electrical compliance. Those requirements need the appropriate product and project-specific design.
Open Working Storage Needs a Deliberate Operating Rule
The physical rack is only one part of an open-storage arrangement. The laboratory should decide which containers remain in daily-use positions, how labels are kept visible, what quantities are appropriate at the bench and when a bottle should be returned to enclosed storage. The page does not set those operating rules, but the rack layout should support them. For example, tier spacing should allow labels to be read, guard rails should not prevent routine retrieval, and the chosen rack depth should not require containers to be stacked behind one another without access.
Information Needed for a Project-Ready Configuration
Provide the bench plan and elevation, available worktop length and material, wall-bench or island orientation, desired rack height and number of tiers, largest bottle sizes and estimated contents, shelf material preference, guard-rail requirement, requested outlets/lighting/utility provisions, fixing constraints and destination. Those inputs allow the selected rack form to be matched to its supporting bench and service environment without treating a reference format as a final fixed specification.
Frequently Asked Questions
What is the difference between a laboratory reagent rack and a test tube rack?
A laboratory reagent rack is a furniture-scale shelf system above a workbench for bottles, glassware and light laboratory items. A test tube rack is a small bench accessory designed to hold individual tubes. They have different product forms and buying requirements.
Can the rack be used on both a wall bench and an island bench?
The product family can be configured for one-sided wall-bench or two-sided island-bench use. The selected rack depth, shelf access, uprights, guard rails and fixing arrangement must match the actual bench layout.
Are sockets and lighting included?
They are selected service options, not automatic scope. The final quotation should state the device count, location, voltage, wiring, grounding, connection responsibility and applicable requirements.
What loading can each shelf carry?
Loading is confirmed with the selected shelf material, thickness, support span, upright arrangement, fixing and intended contents. A value from a different shelf series should not be treated as a general laboratory reagent rack rating.
Can the rack be extended after installation?
An extension is reviewed against the original uprights, fixing pattern, shelf direction, service capacity, available bench length and existing load arrangement. Empty space alone does not prove that another bay can be added.
Contact the Xicheng Engineering Team Today
Send the bench layout, rack length and location, wall-bench or island-bench orientation, shelf count, bottle dimensions, material preference, required guard rails, service options and available fixing details. The proposed configuration can then define the selected rack form, support layout, shelf interface, supply boundary and commercial scope.
Shenzhen Office: No. 34 Zhenxing Road (Shengtaian Heavy Industrial Park B), Loucun, Guangming New Dist, Shenzhen, Guangdong, China
WhatsApp: +86 18126478161
Engineering Mailbox: fanalax34@gmail.com