


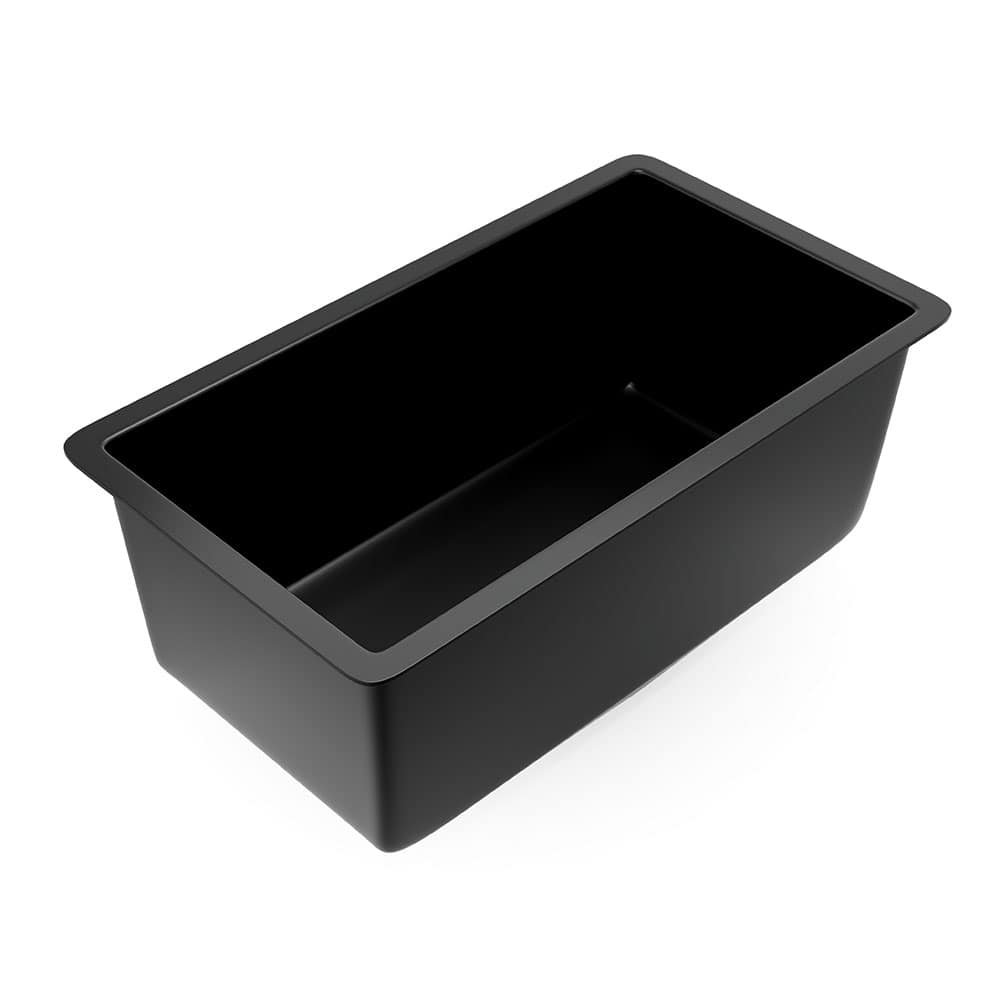
Description
Key Specifications and First Selection
A PP laboratory sink is a standalone polypropylene basin selected for a laboratory countertop, bench or support arrangement. It is not a complete sink station and it is not the cabinet below the basin. The first selection is the basin form: outer envelope, usable bowl size, bowl depth, rim profile, waste position and intended countertop installation all have to work together. A basin that matches a catalogue width may still be unsuitable if its underside conflicts with the cabinet, trap or support members.
The polypropylene lab sink family includes square and rectangular single-bowl forms. Reference formats range from a compact 350 x 350 x 235 mm small-bowl concept to larger 815 x 470 x 330 mm and selected 800 x 450 x 310 mm formats. These are separate reference products, not a continuous universal size range. Their inner bowl dimensions, rim width, wall shape and outlet position must not be inferred from outer dimensions alone.
Select the Basin Before the Cut-Out
- Confirm the actual basin outer length, width and height, then separately confirm internal bowl length, width and depth.
- Identify the installation method: drop-in, flush or a selected supported/undermount arrangement.
- Confirm waste outlet diameter and location, including whether it is centered or offset.
- Check the countertop thickness, cut-out, rim bearing area, sealing method and the clear volume below the basin.
Reference Formats for Early Planning
| Reference basin format | Outer envelope | Suitable planning direction | Confirm before fabrication |
|---|---|---|---|
| Compact square concept | 350 x 350 x 235 mm | Small wash point or limited bench space | Actual bowl size, outlet, rim and top cut-out |
| Medium rectangular concept | 420 x 320 x 230 mm | General single-user laboratory washing point | Bowl depth, faucet reach and below-top clearance |
| Medium/deep rectangular concept | 552 x 400 x 235 mm | Larger glassware or routine wash work | Support arrangement, trap envelope and working surface layout |
| Large single-bowl concept | 815 x 470 x 330 mm or selected 800 x 450 x 310 mm | High-volume or larger-item wash area | Final inner dimensions, drain position, cabinet clearance and top interface |
These values establish the size discussion only. The selected PP laboratory sink is released from its final drawing and approved installation details, not from a reference format assembled from multiple basin families.
Product Scope and Supply Boundary
The product covered on this page is the PP basin. Its selected scope can include the basin body and any specifically listed drain fitting, plug, strainer, overflow component or trap option. A countertop, faucet, sink base cabinet, water supply, drain pipework, sealant, site cutting and final plumbing connection remain separate items unless they are expressly stated in the quotation. This boundary matters because a laboratory sink is normally installed across several trades.
Do Not Read the Product Name as a Complete Station
A sink bowl can be mounted into a Laboratory Countertop, supported by a Laboratory Sink Base Cabinet, or arranged in a Laboratory Wall Bench or Laboratory Island Bench layout. Those surrounding products are not automatically part of the basin supply. The completed installation also requires a selected faucet and a defined route for water and waste.
Itemize Drain Accessories
Waste outlets, plugs, strainers, overflow parts and bottle traps vary by basin configuration. Some arrangements include a selected outlet assembly; others require a separate trap or use a different drain connection. Confirm the whole assembly in the schedule. An outlet shown in a product image does not confirm that every drain accessory, seal or downstream connection is included.
Colour and Finish Are Configuration Fields
Black PP basins are common, while white and grey options also exist in selected forms. Colour is not an independent performance claim and should be selected together with the actual basin geometry and material configuration. The quotation should identify the requested colour, visible rim finish and any accessory colour requirements.
Basin Geometry and Countertop Interface
The countertop interface is usually the decisive detail for a polypropylene laboratory sink. Outer dimensions define the space the basin occupies. Inner dimensions define the usable washing volume. Rim width and profile determine how the basin bears on or connects to the worktop. The underside depth determines the space needed for the outlet, trap and support arrangement. Treating these as one dimension causes most early selection errors.
Drop-In, Flush and Supported Installations
A drop-in arrangement uses the basin rim to overlap the top cut-out. A flush arrangement needs the surface level, recess and sealing approach to be coordinated more closely. A supported or selected undermount arrangement needs a defined load path between the sink, top and supporting structure. The actual countertop material, thickness, edge treatment and fabrication method decide which arrangement can be used. Never cut the worktop from a generic outer-size figure without the selected basin drawing.
Long-Side Basin and Rim Relationship
The figure below shows the type of long-side relationship that must be considered when the basin passes through a countertop: rim bearing area above, bowl wall below and the underside space that remains for services. It illustrates basin geometry only; it is not a universal cut-out or support drawing.

Draw the Complete Interface
The project drawing should show countertop thickness, cut-out size, rim overlap or recess, selected sealant, faucet holes, bowl and outlet position, cabinet rails, support brackets and neighboring panels. If the top supplier fabricates the opening separately from the cabinet supplier, identify who confirms the final basin drawing before cutting. This protects the finished worktop and keeps the PP basin from being used as an on-site template.
The drawing should also establish the datum from which the basin and service points are located. For example, a centered outlet can conflict with a center cabinet rail even when the outside bowl envelope fits inside the cabinet width. A rear outlet may improve clearance for a front service space, but it can change the required trap route and the position of nearby faucet supplies. These relationships should be fixed against the actual bench plan, wall return or island layout before the worktop, cabinet and plumbing trades proceed independently.
Select Bowl Capacity for the Task, Not for the Largest Nominal Size
The practical basin capacity depends on the internal length, width and depth, not simply the outer footprint. A shallow, wide bowl can be convenient for rinsing trays or arranging small laboratory items, while a deeper bowl can provide more contained washing volume where splash control and vertical clearance are appropriate. Neither layout is automatically preferable: the required washing task, the faucet reach, the available bench depth and the under-counter service space need to be considered together.
If the sink is being selected for a defined vessel, tray or equipment component, provide the largest item that must enter the bowl and the required clearance around it. This avoids choosing a reference dimension that fits the worktop while leaving insufficient usable basin space. Where more than one basin size is under consideration, the approved drawing should identify the exact internal bowl dimensions as well as the outer rim envelope.
Keep Service Volume Below the Bowl
The bowl depth is only part of the under-counter envelope. Add the outlet fitting, tailpiece, trap, supply valves, hoses and any required access route. A large bowl may be suitable for the washing task but require a deeper cabinet opening or different plumbing route. The selected basin should be checked with the actual cabinet and service layout, not placed above a standard shelf plan.
Drain, Accessories and Under-Sink Coordination
The waste connection must be treated as a selected wet path rather than a single hole at the bottom of the PP sink. The basin outlet, plug, strainer, overflow arrangement, tailpiece, trap and downstream pipe may be made from different materials and supplied by different parties. Their geometry, seals and compatibility conditions need to be reviewed together before the sink is ordered.
Confirm the Outlet Arrangement
Record outlet diameter, thread or connection type, centerline position, plug and strainer requirement, overflow provision and trap requirement. A centered outlet may suit one cabinet layout while an offset outlet creates needed clearance for a valve, drawer or support member. The correct location is determined by the basin drawing and the actual plumbing route.
Short-Side Depth and Under-Bowl Space
This figure shows the type of short-side bowl profile that must be checked against the worktop, cabinet and drain route. It helps establish clearance thinking; it does not confirm the selected basin depth or trap position for every PP laboratory sink.

Coordinate the Sink Base Cabinet
Where an enclosed cabinet is used, use the Laboratory Sink Base Cabinet to plan doors, removable back or bottom, false-front treatment and trap access. The cabinet cannot be finalized from the sink’s top view alone. It needs the selected bowl depth, outlet location, pipe entry direction, valve location and the route a technician will use for service.
| Interface item | Why it matters | Information to schedule | Do not assume |
|---|---|---|---|
| Waste outlet | Connects the selected basin to the drain route | Diameter, location, connection and included parts | Center location or a universal fitting |
| Plug, strainer and overflow | Affects daily use and basin configuration | Whether each item is supplied and its selected form | That every PP basin includes all accessories |
| Trap and downstream pipe | Occupy space and form part of the wet path | Material, geometry, route and maintenance access | Chemical suitability from the PP basin alone |
| Cabinet and support | Keeps plumbing reachable below the top | Door/access arrangement, rails and service opening | That a standard base cabinet clears the bowl |
PP Material Selection and Wet-Path Compatibility
Polypropylene is selected because the basin material can suit a range of laboratory wet-service applications when the actual exposure is defined. An acid resistant lab sink should be chosen from the complete liquid path, not from a broad material phrase. The media, concentration, temperature, contact duration, cleaning process and all components exposed to the liquid need to be reviewed together.
The Basin Is Only One Part of the Contact Path
The selected PP basin may be joined by a waste outlet, plug, strainer, overflow part, seals, trap and downstream drainage materials. A compatible bowl does not make every fitting or pipe compatible. The project should identify each wetted component and select materials against the actual operating and cleaning conditions. This is particularly important where solutions are warmed, retained in the bowl, mixed during cleaning, or discharged through a selected trap.
Match the Basin Shape to the Actual Wet Work
The bowl geometry is part of material selection because it changes how liquid is used and removed. A compact square PP sink can suit localized rinsing or small-item washing where the required fluid volume is limited. A deeper or wider rectangular polypropylene lab sink may be more appropriate where bottles, trays, small apparatus or larger wash loads must be handled inside the bowl. The choice should consider usable internal space, drain location, splash path and the available worktop area rather than outer dimensions alone.
Where a work process leaves solids, residues or loose fragments in the basin, identify the required strainer arrangement and cleaning access before selecting the outlet. Where a process calls for frequent rinsing, the drainage route and under-sink clearance become as important as the bowl material. These are configuration decisions, not standard inclusions for every PP sink.
Do Not Convert a Material Name into an Unlimited Claim
PP laboratory sink pages often use chemical or acid-resistance terminology, but these terms require application limits. They do not prove suitability for every reagent, concentration, temperature or exposure period. Obtain the final compatibility decision from the selected basin configuration and the complete drain assembly. The same restriction applies to claims about UV, thermal cycling, impact or long-term service life when no product-specific condition is defined.
Cleaning and Care Must Match the Selected Basin
Use a cleaning method appropriate for the selected PP basin and its accessory assembly. Avoid treating any single supplier instruction as a universal rule, because cleaners, sealants and drain components can differ. The site procedure should identify permitted cleaning agents, rinsing practice, drainage conditions and inspection of the outlet and seals. This preserves a defensible maintenance plan without claiming universal chemical performance.
Inputs Needed for a Material Decision
Provide the process liquid, concentration, expected residues and whether contact is occasional, repeated or continuous. Add the working temperature, the time liquid may remain in the bowl, and the cleaning agent and rinse routine. These details establish the exposure at the bowl itself.
Then list the proposed outlet, strainer, plug, overflow arrangement where applicable, seals, trap and downstream pipe materials. The completed list makes it possible to review the full wet path instead of approving only the polypropylene basin. It also identifies whether a selected accessory requires a different material, thread, drain diameter or service clearance.
Installation, Cleaning and Maintenance Planning
Install a PP laboratory sink from the approved basin and countertop drawings. Confirm the cut-out before fabrication, protect the rim during handling, and follow the selected sealing and support arrangement. The finished basin must sit level enough for the intended drainage arrangement while leaving access to the outlet, trap and valves below. A visible rim may conceal a poor support or drain condition, so the installation inspection should include the underside as well as the finished worktop surface.
Pre-Installation Checks
Check the external basin envelope, bowl depth, rim overlap, cut-out, countertop thickness, faucet-hole positions, selected sealant, drain centerline and support route. Confirm that cabinet rails, drawers, shelves and service valves do not conflict with the bowl or trap. Where the sink is installed near a wall, backsplash or other equipment, include the clearance needed to make and inspect the joint.
For a drop-in arrangement, the fabricator should work from the approved basin dimensions and rim requirement rather than from an approximate nominal size. The cut-out needs to support the selected rim consistently while allowing the specified joint to be formed and inspected. For a flush or specially supported arrangement, confirm the support surface, finished top level and any edge treatment before the countertop is cut. A basin can appear to fit from above while its drain or underside support conflicts with the bench below.
Coordinate Faucet and Service Positions Before Cutting the Top
A laboratory sink is normally coordinated with a selected faucet, service valve arrangement and drainage route, but these items are not interchangeable. Confirm whether the faucet is deck-mounted, wall-mounted or supplied through a separate service panel. If holes are required in the worktop or sink rim, their location must be set against the bowl edge, backsplash, faucet body and required access to the fixing hardware. This prevents a completed top from forcing an unsuitable faucet position or obstructing use of the bowl.
The same coordination applies below the top. The drain outlet, trap, pipe entry and isolation valves need a route that can be reached without removing the entire cabinet or disconnecting unrelated services. Where a bench is supplied with a cabinet, the shelf and rail layout should be checked against the drain centerline. Where the basin is fitted into an open support frame, confirm how pipework is protected from accidental impact while remaining accessible for inspection.
Maintenance Access Is a Design Requirement
The selected plug, strainer, outlet and trap must be reachable after the countertop is installed. A cabinet door that opens wide is not always sufficient if a fixed back, shelf or rail blocks the trap. Coordinate the access route with the cabinet, wall or floor entry and the direction in which the trap or outlet assembly can be removed. This reduces future disruption without turning a service opening into a claim that every accessory is included.
Inspection after installation should cover the rim joint, basin support, faucet fixing where used, drain connection and the accessible sections of the waste route. Before the wet area enters service, fill and drain the selected basin under controlled conditions and check for standing water, seepage, movement at the rim and interference with cabinet doors or removable shelves. The commissioning method and acceptance criteria remain a project responsibility, but planning this access prevents avoidable rework after the bench is in use.
Installation Inputs for Quotation
| Installation input | Why it affects the sink | Information to supply | Coordination result |
|---|---|---|---|
| Basin drawing and finish | Establishes exact geometry and selected colour | Required outer/inner dimensions, colour and quantity | Correct PP basin configuration can be proposed |
| Countertop and mounting method | Controls cut-out, rim and support | Top material/thickness and drop-in, flush or support approach | Cut-out and mounting details can be defined |
| Drain and faucet layout | Determines service clearances | Outlet route, valve position, faucet holes and pipe entry | Under-bowl and cabinet interfaces can be checked |
| Room and cabinet layout | Prevents installation conflict | Bench elevation, cabinet drawing and wall conditions | Access and installation sequence can be planned |
Applications, Related Products and Selection Boundary
PP laboratory sinks can be selected for laboratory washing points, preparation areas and wet-service benches where the basin geometry, installation and complete liquid path are suitable for the defined work. They can be integrated into wall-side or island laboratory furniture, but the sink remains a separately selected basin. The page supports a configuration discussion; it does not decide chemical storage, wastewater treatment, site plumbing acceptance or overall laboratory process safety.
Choose This Product Family When
- A standalone polypropylene basin is required for a selected countertop or bench layout.
- The project can define bowl size, rim, cut-out, outlet, accessories, cabinet clearance and drain route.
- The actual liquid, operating conditions and cleaning process can be reviewed against the basin and all selected wetted components.
- The required faucet, top, cabinet and plumbing scope can be scheduled separately or in an explicitly stated package.
Related Product Boundaries
Use Laboratory Countertop for the work surface and cut-out interface. Use Laboratory Sink Base Cabinet for below-sink access and casework coordination. Use Laboratory Wall Bench or Laboratory Island Bench for the surrounding furniture layout. A stainless steel laboratory sink is a separate material product family and must be compared on its own material, finish and wet-path requirements.
Frequently Asked Questions
Is the PP laboratory sink supplied with a faucet and cabinet?
The basin, faucet, countertop, cabinet and plumbing are separate scope items unless a final quotation expressly lists them together. Confirm every included outlet and drain accessory individually.
Can a polypropylene lab sink be used for acid service?
It may be considered where the actual liquid and conditions are known, but the final decision must cover the basin, outlet, plug, strainer, seals, trap and downstream pipe. The term acid resistant does not establish unlimited compatibility.
Which sink size should be selected?
Choose from the required bowl volume, largest item to be washed, available worktop space, outlet route and cabinet clearance. Reference sizes help establish a layout, but the final outer and inner dimensions are confirmed from the selected basin drawing.
Contact the Xicheng Engineering Team Today
Send the required bowl dimensions, countertop material and thickness, mounting method, colour, drain and faucet locations, planned wet media, cleaning conditions, cabinet layout and destination. The proposed configuration can then identify the selected PP laboratory sink form, accessory scope, installation interface and commercial boundary.
Shenzhen Office: No. 34 Zhenxing Road (Shengtaian Heavy Industrial Park B), Loucun, Guangming New Dist, Shenzhen, Guangdong, China
WhatsApp: +86 18126478161
Engineering Mailbox: fanalax34@gmail.com