


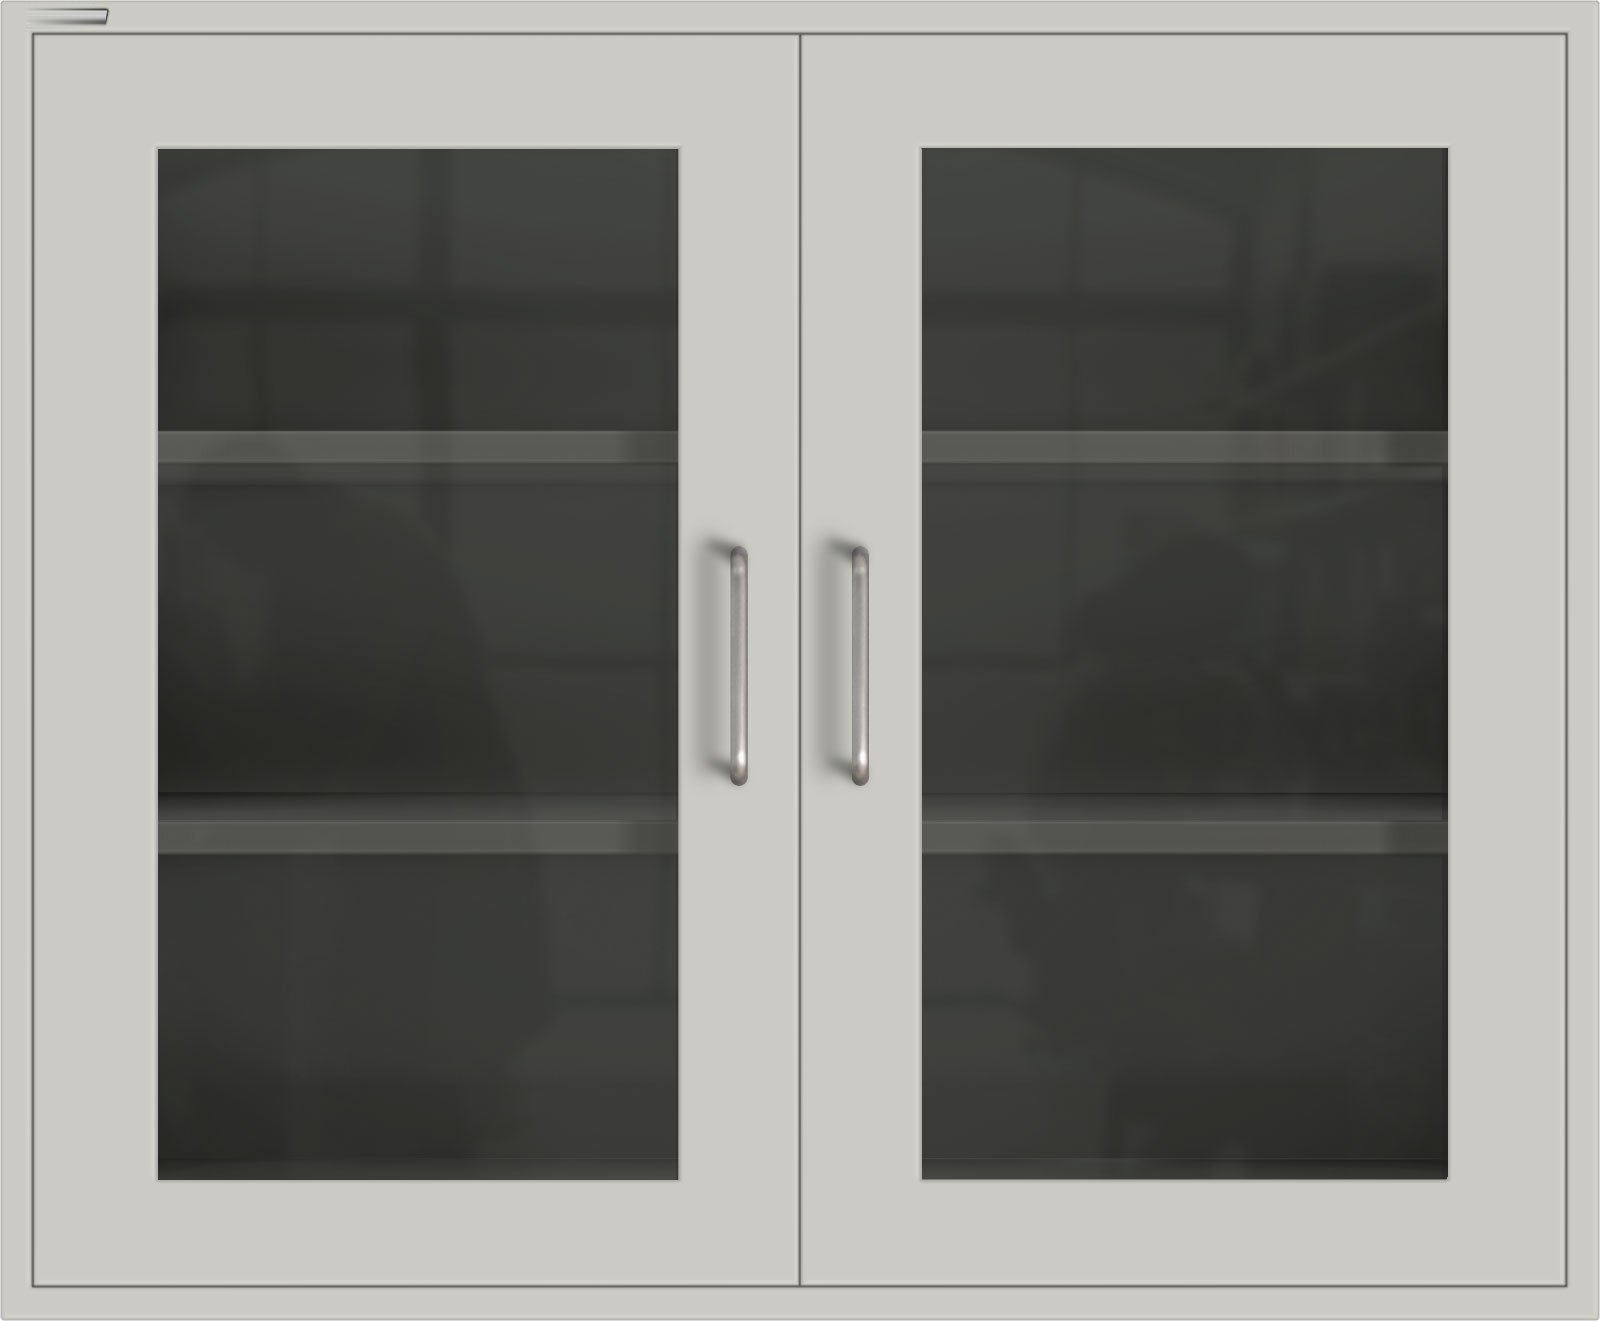
A laboratory wall cabinet creates storage above a worktop without using the floor area below it. It is suited to a planned laboratory work zone where routine supplies, glassware, tools or documentation need to remain within reach while the bench surface remains available for the process. The cabinet is not selected by width alone. Its depth affects the working clearance below, its front style affects the space in front of the cabinet, and its mounting height affects how safely and comfortably users can reach the stored items.
The same wall-mounted laboratory cabinet can be configured with an open front, solid hinged doors, framed hinged glass doors or sliding glass doors. Open storage makes frequently used items immediately visible. Solid doors keep ordinary supplies out of view. Hinged glass doors allow a user to identify contents before opening the cabinet, while sliding glass doors reduce the outward swing area in front of the work surface. The final choice depends on storage visibility, item size, operator access, cleaning requirements and the equipment, faucet, outlet or service post located below the cabinet.
Reference steel wall-cabinet systems commonly use shallow depths around 350 mm or 15 in, with selected widths and heights ranging from compact single-bay units to longer double-door or sliding-front cabinets. These formats provide a practical starting point for a laboratory casework layout, but they do not establish the final installation. The finished cabinet schedule needs to define the external and usable dimensions, front configuration, shelf arrangement, cabinet material, mounting elevation and the separate wall-mounting solution for the site.
Key Specifications and First Selection
What defines a laboratory wall cabinet
A laboratory wall cabinet is a storage enclosure supported by a wall-mounted rail, bracket or other approved fixing method above a laboratory work area. Its cabinet shell, selected front, shelves and hardware form one product module. The building wall, structural reinforcement, anchors, countertop, utilities, lighting and site installation are related requirements but remain separate unless the project scope specifically combines them.
This distinction is essential when a cabinet is placed over a laboratory bench. The empty cabinet has one mass, its shelves have a selected storage condition, the mounting system has its own capacity and the wall structure has a separate allowable condition. Those fields must be coordinated rather than replaced by one generic load statement. Cabinet elevation must also be planned with the worktop, equipment height, faucet, service fittings, outlets, lighting and user reach in view.
Reference wall-cabinet formats and planning dimensions
The formats below provide a first comparison of common wall-cabinet configurations. They are reference arrangements for project planning, not a single fixed product specification. The approved cabinet and installation drawing determine the selected construction, usable storage volume, door system, shelves, mounting method and final dimensions.
| Reference wall-cabinet format | Front configuration route | Appropriate planning use | Confirm before order |
|---|---|---|---|
| 900 W x 350 D x 630 H mm reference format | Hinged solid or hinged glass doors selected for the cabinet schedule | General overhead storage above a planned perimeter work area | Door material, shelf count, usable internal depth, lock, mounting elevation, wall condition and selected fixing method |
| 36 W x 15 D x 30 H in reference format | Hinged glass-door cabinet | Storage that benefits from visible contents while retaining a closed front | Glass and frame specification, usable door opening, shelves, hinge direction, clearance below and mounting route |
| 900 W x 350 D x 750 H mm reference format | Sliding-glass front | Wall storage where door swing must be limited in front of the bench | Effective opening width, track and guide arrangement, shelf layout, glass specification, access pattern and cleaning clearance |
| 450 to 1500 mm width family with approximately 350 mm depth | Open, solid-door, hinged-glass or sliding-glass layout selected by cabinet position | Continuous laboratory casework runs with varied storage requirements | Final W x D x H, wall-run layout, end fillers, corner conditions, stored-item list and installation drawing |
Inputs to establish before a wall cabinet is scheduled
Start with the wall elevation and the work area below it. Mark the cabinet positions, wall width, required cabinet widths, cabinet bottom elevation and the finished worktop level. Show any faucet, service post, electrical outlet, light, equipment or display located below the cabinet. This makes it possible to check both the upward reach and the clearance needed to open or slide the selected front without creating a conflict at the work surface.
Next, list what will be stored in each cabinet. Record the largest item height, depth and mass, the required shelf spacing, the need for visibility, the access frequency and whether doors or locks are needed. This information determines whether an open laboratory wall cabinet, a solid-door laboratory wall cabinet, a glass-door configuration or a sliding-glass configuration is the practical route for that position.
Finally, confirm the mounting information. The project needs the wall material, structural or stud locations, possible reinforcement, mounting-zone limitations and the required installation standard. Include the cabinet dimensions, selected front, shelf arrangement and proposed storage contents with the wall drawing. A lab wall cabinet can then be selected as part of a coordinated work area rather than fitted above the bench after the cabinet, equipment and service layout have already been fixed.
Product Scope and Mounting Boundary
What the wall-cabinet module can include
A laboratory wall cabinet is scheduled as one overhead storage module within a laboratory casework layout. The selected cabinet can include the enclosure, planned external width, depth and height, open front or selected door style, shelves, handles, hinges or sliding hardware, selected locks, shelf supports, end panels and cabinet-side access details. The specific scope depends on the approved cabinet schedule. A hinged solid-door cabinet, a framed glass-door cabinet and a sliding-glass cabinet use different front components, opening relationships and hardware arrangements even when they share a similar cabinet envelope.
The cabinet can also be coordinated with adjacent wall cabinets, fillers, corner conditions and a planned rail or bracket route. This coordination is important when several laboratory wall cabinets form a continuous row above a worktop. It allows the cabinet widths, door directions, shelf locations and visual alignment to be established before the work area is fitted out. The cabinet module remains one part of that row; it does not automatically include the worktop, lower cabinets, utility fixtures or building works below it.
Material and front details should be scheduled at component level. A selected steel configuration can include a powder-coated metal shell, a solid metal door or a framed glass front with chosen hinges, pulls and shelf supports. A stainless or other material construction uses its own component specification. The selected cabinet schedule should identify the shell, front, shelf, hardware and finish rather than treating a general wall-cabinet name as a complete material statement.
What remains outside the wall-cabinet scope
The wall, backing structure, reinforcement, mounting rail, brackets, anchors and installation acceptance remain separate project decisions unless the scope explicitly includes a defined mounting package. A laboratory wall cabinet can be designed for a selected mounting route, but the cabinet itself does not prove the condition of concrete, masonry, stud walls, backing plates, utility chases or other substrates behind it. The installation detail must be matched to the wall construction, the selected cabinet configuration and the planned stored load.
The laboratory countertop, bench surface, base cabinets, sink, faucet, plumbing, electrical outlets, data, lighting and service posts below the cabinet are also separate components. They affect the installation elevation and front clearance, but they are not included by the cabinet name alone. Where the cabinet is above a wet-service or equipment area, the worktop and service drawing must show how the wall cabinet avoids conflicts with the items below it.
A general wall-mounted storage cabinet is not a tall cabinet, a mobile cabinet, a sink base, a fume-hood enclosure or a regulated safety-storage cabinet. It should not be selected for flammable liquids, aggressive chemicals, toxic materials, controlled substances or other contents that require a dedicated safety construction, containment feature or compliance condition. The intended stored materials need to be reviewed before a wall-cabinet layout is released.
This scope boundary gives the quotation a usable basis. It identifies whether the enquiry is for cabinet modules only, a coordinated wall-cabinet row, or a larger bench and storage installation. It also separates cabinet supply from wall preparation, utility work and site fitting, so the cabinet elevation, front style and mounting requirements can be resolved before the cabinet reaches the installation area.
Door Styles and Storage Visibility
Open, solid, hinged-glass and sliding-glass front choices
The front style determines how a laboratory wall cabinet behaves above the work area. An open front gives direct access and makes stored items easy to identify, but the contents remain exposed to dust, visual clutter and incidental contact. A solid-door laboratory wall cabinet keeps ordinary supplies out of view and can help maintain a cleaner visual line across a long wall run. The selected door must still have enough space to open without contacting a service post, faucet, task light, monitor or operator working below it.
A glass door laboratory wall cabinet allows users to identify routine stock without opening the front. This can reduce unnecessary door movement where multiple people share the same work area. The selected glass, frame, hinges and handles remain part of the cabinet configuration. Glass visibility does not automatically establish a safety rating, impact rating, dust seal, chemical compatibility or a regulated-storage condition; the cabinet should be selected for ordinary laboratory storage unless a separate purpose-built construction is specified.
A sliding glass door laboratory wall cabinet is useful where a hinged door would extend into a restricted area in front of the bench. The front panels move across the cabinet rather than swinging outward, which can be helpful when the wall cabinet is mounted over a narrow aisle or a densely equipped work surface. Sliding doors do not expose the complete cabinet opening at one time, so the effective opening width and the placement of larger stored items should be checked before this option is chosen.
Selecting the front around access, visibility and clearance
The right front style follows the stored items and the usable work zone below the cabinet. Consider not only whether a container will fit inside the cabinet, but also whether the user can reach it, see it, remove it and return it without blocking an adjacent task. The matrix below supports that comparison and identifies the information that belongs on the cabinet schedule.
| Storage and access pattern | Suitable front style | Planning advantage | Confirm in the cabinet schedule |
|---|---|---|---|
| Frequently used small supplies that benefit from immediate visual access | Open laboratory wall cabinet | No door movement and quick retrieval from the shelf face | Item height, shelf edge or restraint, cleaning routine, cabinet elevation and risk of exposed contents |
| Ordinary supplies that should remain visually screened | Solid hinged door | Closed front and full door opening when clearance is available | Door handing, hinge side, opening path, usable shelf depth, lock requirement and clearance below |
| Shared stock that needs to be identified before opening the cabinet | Hinged glass door | Visible inventory with a complete front opening when the door is open | Glass and frame configuration, hinge direction, door clearance, shelf arrangement and cleaning method |
| Cabinet position above a bench with limited forward opening space | Sliding glass door | Reduces outward door swing in front of the work area | Effective opening width, sliding-panel overlap, track and guide arrangement, shelf access and door-cleaning space |
| Mixed work area with both high-frequency and protected storage | Coordinated open and closed cabinet modules in the wall run | Assigns direct access and enclosed storage to different cabinet positions | Cabinet sequence, shared elevation, front styles, end conditions and stored-item list per module |
Sliding-door selection needs a separate access check. The panels may be easy to move, but a user can normally reach only part of the cabinet opening at a time. Large containers, wide trays and equipment accessories should be checked against the clear opening created by the selected panels and their overlap. Shelves should also be arranged so that frequently used items are not placed in a position that is awkward to reach behind the closed panel.
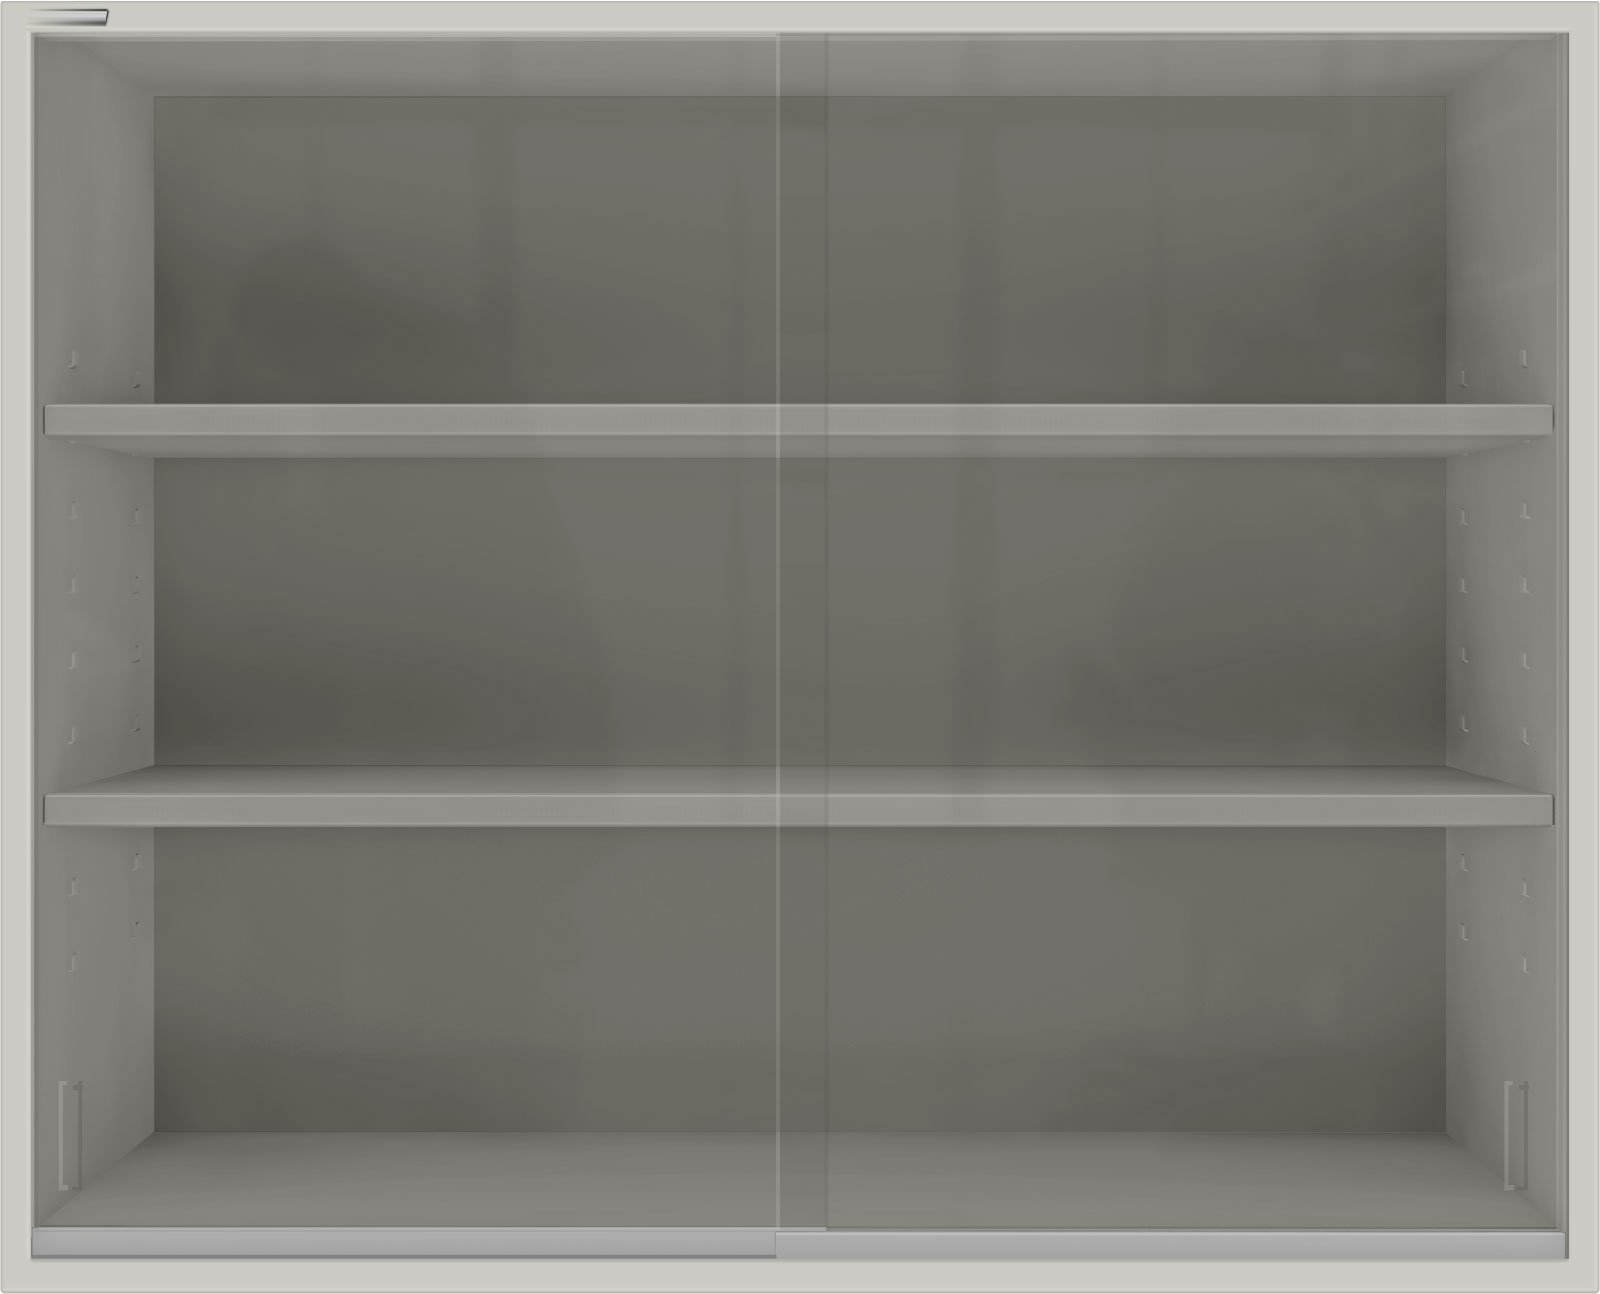
Door-style selection should also account for operations below the cabinet. A faucet may conflict with a low-hung door, a service post may limit the reachable opening, and a tall instrument can reduce the clearance available for a lower cabinet elevation. Show those elements on the elevation drawing rather than assuming that a cabinet front can be changed after the mounting position has been fixed. This keeps a wall-mounted laboratory cabinet useful for the actual work area, not merely for storage on paper.
Cabinet Construction, Materials and Hardware
Steel cabinet construction and material selection boundary
A laboratory wall cabinet is an elevated storage enclosure, so the cabinet shell and the mounting arrangement need to be considered together. A selected steel configuration may use cold-rolled or galvanized steel components with a powder-coated finish, together with a formed, welded or assembled shell suited to the chosen cabinet series. That description applies only when it is included in the selected configuration. The side panels, back panel, top, bottom, door frame, shelves and any exposed end panel do not automatically share one thickness, reinforcement pattern or coating detail.
The cabinet schedule should therefore describe the construction as a set of parts rather than a broad metal claim. Record the shell material and finish, the front construction, the shelf material, the back-panel arrangement and any required end or filler panels. Where the cabinet is part of a long wall run, also identify the joint between adjacent cabinets, the exposed end condition and the relationship to the wall-mounting rail or brackets. This makes a visible run of laboratory casework easier to coordinate before the individual cabinets are delivered.
Stainless steel, compact laminate, phenolic and other material systems should be treated as separately selected constructions. A stainless steel wall cabinet may be appropriate where a project requires a particular cleanability, moisture or process-exposure approach, but the grade, surface finish, weld treatment and component thickness still need to be set for the selected cabinet. A change from powder-coated steel to another material system can also change the door, shelf, edge and mounting details. It should not be assumed to be a cosmetic substitution only.
Solid doors, glass fronts, shelves, hardware and selected locks
The front components determine how the cabinet is used every day. A solid-door front provides enclosed overhead storage, while a framed glass front makes routine contents visible. Hinged fronts require a selected opening direction, hinge arrangement, pull or handle and clearance path. Sliding fronts require a selected track, guide, panel overlap and effective opening. The front style should be listed with the cabinet rather than left as a general finish choice, because it affects both access to stored items and the working clearance below the cabinet.
Shelves also need to be scheduled around the intended contents. Confirm the number of shelves, whether shelf positions need adjustment, the usable internal height, any shelf edge or restraint detail, and the approximate size and weight of the items to be stored. A shelf layout suitable for bottles, consumables and small containers may not suit tall instruments, boxed supplies or wider trays. The selected shelf and its supports should be reviewed with the cabinet width and the planned storage duty instead of assigning one shelf arrangement to every cabinet in the room.
Handles, hinges, sliding-door hardware and locks are separate functional choices. A project may need keyed storage, shared-key arrangements, a selected handle profile, concealed or exposed hinges, soft-close behavior where specified, or a particular cleaning approach around tracks and pulls. These are useful details to record early because they influence the cabinet front, everyday access to stored items and the replacement-parts requirement after installation. They do not establish a security, chemical-storage or regulated-material rating unless that function is expressly defined for the selected cabinet.
The solid-door configuration below illustrates an enclosed-front laboratory wall cabinet. It does not establish a universal shell material, panel gauge, shelf load, lock package, door clearance or wall-mounting capacity.
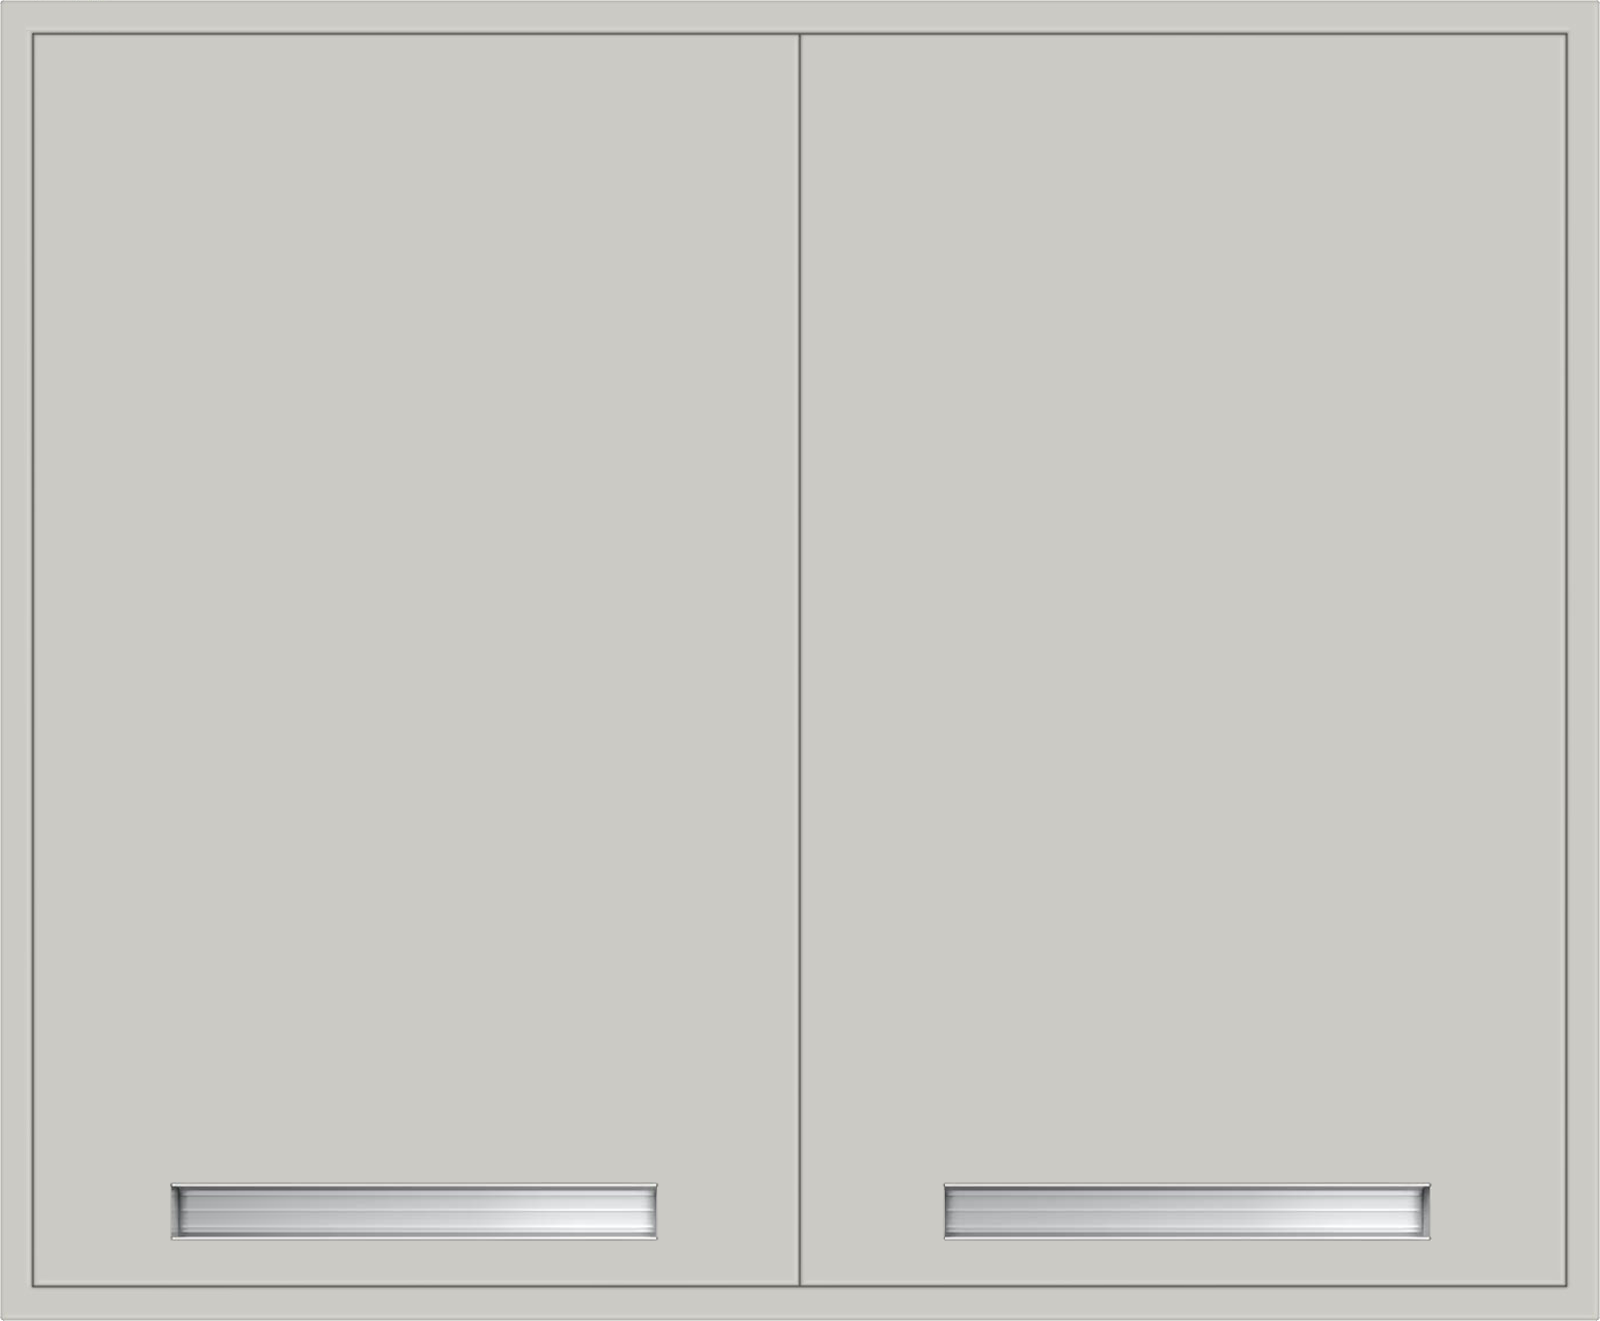
The cabinet drawing and order schedule should connect these parts into one usable assembly. Include the cabinet width, depth and height; front style and door handing; interior shelf layout; selected materials and finish; handle and lock requirements; adjacent cabinet or end-panel conditions; and the mounting method to be coordinated with the wall construction. This gives the installer and the laboratory team a clear description of the actual wall-mounted storage unit rather than a generic cabinet label.
For projects that combine overhead storage with a work surface, the cabinet finish and front layout should also be coordinated with the laboratory base cabinet and laboratory countertop below. The three items form one working elevation, but each retains its own material, dimensional and installation decisions.
Wall Mounting, Clearances and Installation Planning
Wall structure, bracket and anchor coordination
A laboratory wall cabinet is only as suitable as the selected cabinet, mounting system and supporting wall work together. The cabinet shell may be supplied with a mounting rail, brackets, hanging points or another specified method, but the wall construction, reinforcement, anchors and fixing locations remain project conditions that must be coordinated before installation. A masonry wall, reinforced concrete wall, framed partition and service-lined wall can require different fixing arrangements. The cabinet should not be treated as self-supporting simply because it is shown above a worktop in an elevation drawing.
Provide the wall type and the intended cabinet line early in the enquiry. The selected mounting detail can then be considered with the cabinet width, cabinet depth, stored contents, shelf layout and number of adjacent modules. The installed assembly includes the cabinet, shelves, front panels, stored items, mounting components and wall support. Each element matters when the project team defines the mounting approach. A wall cabinet and its shelf arrangement do not establish the wall’s allowable load or the suitability of a particular anchor without a project-specific check.
The cabinet layout should also make access to the mounting area practical. A long run may need clear end conditions, a shared mounting rail, joint covers, alignment tolerance and a sequence for setting the cabinet level. If the wall contains services, recessed boxes, conduits or structural changes, locate them before drilling or setting the cabinet elevation. This avoids discovering conflicts after the cabinet width, door style and shelf pattern have already been fixed.
Cabinet elevation, worktop clearance and adjacent services
The clearance below a laboratory wall cabinet affects how the bench is used. It must accommodate the selected worktop, any backsplash or upstand, faucets, service posts, outlets, task lighting, instrument height and the opening path of the selected doors. A 900 W x 350 D x 630 H mm hinged reference configuration and a 900 W x 350 D x 750 H mm sliding reference configuration describe cabinet formats, not a universal installed elevation. The mounting height should be established from the actual bench height and the equipment or services in the work zone below.
For a coordinated laboratory run, show the wall cabinet, worktop and lower storage on the same elevation. A laboratory countertop may need a backsplash, rear service zone or a clearance for equipment, while a laboratory base cabinet may set the working height below. A wall cabinet can be positioned over either, but it should not block the operation of a sink, eyewash, local service valve, tall instrument or lid that needs to open. Door handing and sliding-panel travel should be checked with the clear zone in front of the cabinet rather than only with the cabinet dimensions.
| Installation input | Why it affects the wall cabinet | What to provide | Coordination action |
|---|---|---|---|
| Cabinet line, finished wall elevation and target mounting height | Sets the cabinet position relative to users, benches and adjacent modules | Elevation drawing with wall dimensions, ceiling constraints and cabinet sequence | Establish one reference datum and identify the underside and top-of-cabinet levels for every module |
| Wall construction, reinforcement and fixing zone | Determines whether the selected mounting arrangement can be used | Wall section, substrate description, reinforcement locations and concealed-service information | Coordinate the mounting rail, brackets and anchor locations with the wall condition before installation |
| Stored items and shelf arrangement | Changes the practical duty of the cabinet, shelves and mounting assembly | Item list, approximate container or equipment dimensions and intended shelf locations | Select shelf count, shelf positions and the mounting approach around the actual storage use |
| Worktop, base cabinet, sink, faucet and service equipment | Can reduce the clear working space or conflict with doors and cabinet access | Combined elevation showing bench height, worktop, service posts, faucets, outlets and equipment | Set the cabinet underside clearance and front style so that normal work and service access remain possible |
| Door movement and reachable opening | Hinged and sliding fronts use the area in front of the cabinet differently | Door handing, required opening path, aisle condition and location of tall equipment | Check the full opening path or effective sliding opening before the cabinet front is scheduled |
| Delivery and installation constraints | Large modules may need a planned handling route and installation sequence | Site access dimensions, lift or stair limitations, installation order and adjacent completed work | Divide the run into manageable modules and protect finished worktops and equipment during installation |
The completed cabinet installation should be easy to use and service, not just capable of fitting within the available wall width. Leave enough room to open the selected front, reach the rear of a work surface, clean around the tracks or hinges, and remove routine stored items without placing them on a live work area. When the cabinet is installed over a laboratory wall bench, the combined elevation is especially important because the wall itself carries both the visual line of the storage and the services used at the bench.
Information to include with a mounting enquiry
For each laboratory wall cabinet or cabinet run, provide the desired width, depth and height; front style; shelf arrangement; materials and finish; wall construction; intended mounting elevation; worktop and equipment conditions below; storage duty; quantity; and destination. Add a wall elevation, reflected service information and adjacent cabinet layout when available. This allows the scheduled cabinet and mounting details to be considered as one installed arrangement instead of as unrelated pieces of casework.
Applications, Related Products and Selection Boundary
Typical locations for laboratory wall-mounted storage
A laboratory wall cabinet is used to place ordinary supplies above a working surface while keeping the floor and bench area available for people, equipment and routine tasks. It can be arranged over a perimeter bench, above a sink run where sufficient clearance is designed, beside a tall equipment position, or within a coordinated wall of laboratory casework. The useful application is defined by the stored items, the work taking place below and the available clearance for access, not by cabinet width alone.
For routine consumables, glassware, clean containers, small tools and shared supplies, an open, solid-door, hinged-glass or sliding-glass front can be selected around visibility and access. A glass-front laboratory wall cabinet can help users identify stock before opening the cabinet. A solid-door cabinet can screen general supplies. A sliding-glass arrangement can reduce forward door swing where the work area below cannot accommodate a hinged panel. The selected front does not change the need to consider the storage duty, cabinet elevation and wall mounting as one coordinated installation.
Laboratories with repeated bench positions often benefit from a consistent cabinet line above each station. The layout can use identical modules or vary the door types by activity: glass fronts for shared visual stock, solid fronts for general storage and open modules where rapid retrieval is needed. In every case, the cabinet sequence should be shown on a wall elevation together with the work surfaces, electrical points, service outlets and equipment that occupy the area below.
Related laboratory casework and work surfaces
A laboratory wall cabinet is one part of a working elevation. It is frequently paired with a laboratory wall bench where the bench follows a perimeter wall and the wall cabinet provides overhead storage. It can also be coordinated with a laboratory island bench that faces the wall, although the cabinet normally remains attached to the wall rather than to the island bench itself. These layouts need a clear circulation path so a person retrieving supplies from the wall cabinet does not obstruct work at the central bench.
The lower storage and work surface should be scheduled separately. A laboratory base cabinet supports under-worktop storage and may define the working height. A laboratory countertop provides the horizontal task surface and may need to accommodate a backsplash, sink, service outlet, instrument or equipment opening. The wall cabinet completes the upper zone, but it does not include the base cabinet, worktop, sink, faucet, service fixtures or utility connections unless those items are separately listed in the project schedule.
This division makes selection more practical. A team can choose the wall cabinet around stock visibility and reach, the base cabinet around under-worktop storage, and the worktop around the process, cleaning and equipment interface. The final elevation then brings those decisions together without forcing one cabinet specification to stand in for the whole laboratory workstation.
When a laboratory wall cabinet is not the right storage type
A laboratory wall cabinet should not be selected merely because a room needs additional storage. Tall storage may be more suitable for large boxed supplies or equipment that cannot be safely reached from an elevated shelf. A mobile cabinet or cart may be more suitable where storage has to move between work zones. A sink cabinet, service chase or equipment enclosure has its own access and utility requirements. These are different casework functions, even when their exterior finish is intended to match the wall cabinet run.
The wall-mounted laboratory cabinet is also not a substitute for a purpose-built flammable, corrosive, toxic, controlled-substance or other regulated-material storage cabinet. The front style, ordinary lock option or visible glass panel does not establish a chemical-storage classification, fire performance, ventilation arrangement or compliance function. Where a specific storage hazard or regulatory requirement applies, select a cabinet designed and specified for that duty rather than extending the claims of general laboratory wall storage.
Avoid using a wall cabinet as a structural support for services, ductwork, lighting, heavy equipment or independently suspended accessories unless the full installation has been designed for that arrangement. The product schedule should remain focused on overhead storage: cabinet geometry, fronts, shelves, materials, mounting coordination and the clear work zone below. Keeping that boundary clear helps the laboratory wall cabinet remain easy to use, maintain and adapt when the stored items or bench activities change.
Frequently Asked Questions
Which front styles are available for a laboratory wall cabinet?
Laboratory wall cabinet configurations can be planned with open shelving, solid hinged doors, hinged glass doors or sliding glass doors. The appropriate choice depends on whether the contents need immediate access, visual identification, an enclosed front or limited forward door swing. Confirm the selected front, door handing or sliding direction, shelf arrangement and clearance below the cabinet in the cabinet schedule.
How should the published reference sizes be used?
Reference formats such as 900 W x 350 D x 630 H mm for a hinged configuration and 900 W x 350 D x 750 H mm for a sliding configuration help establish the cabinet family and the space required above the work area. They are not a fixed installation rule. The final width, depth, height, front style, shelf layout and mounting elevation should be set from the room drawing, the stored items and the equipment or services below the cabinet.
Can a laboratory wall cabinet be mounted on any wall?
No. The wall construction, reinforcement, mounting rail or bracket arrangement, anchors, cabinet configuration and planned storage duty must be coordinated for the installed location. Provide the wall section or substrate information and the intended cabinet line before the mounting method is selected. A general wall cabinet description does not establish that an existing partition or a particular fixing method is suitable for the completed installation.
Can shelves be adjusted or added?
Shelf count, shelf positions, adjustment pattern, shelf material and support arrangement are selected with the cabinet configuration. State the approximate dimensions and expected weight of containers, trays, glassware or equipment accessories that will be stored. This helps determine whether the internal arrangement gives practical access and sufficient usable height rather than simply filling the cabinet with standard shelves.
Can a wall cabinet be installed above a sink or laboratory bench?
It can be planned above a bench or part of a sink run where the elevation and clearance allow normal operation. The combined drawing should show the worktop height, backsplash, faucet, service posts, outlets, task lights, tall instruments and the selected door movement. A cabinet front that fits above a bare bench may conflict with a faucet or an instrument once the full work area is installed.
What is needed for a project-ready quotation?
Provide the number of cabinets; required width, depth and height; front style; desired shelf layout; material and finish; door, handle and lock options; wall construction; mounting height; the worktop and equipment conditions below; approximate storage duty; project drawings; delivery destination; and required quantity. A wall elevation and nearby service layout are particularly useful for a multiple-cabinet run.
Contact the Xicheng Engineering Team Today
Send the wall elevation or room drawing together with the required cabinet width, depth and height, selected open, solid, hinged-glass or sliding-glass front, shelf and storage requirements, wall construction or reinforcement details, mounting height, worktop or equipment conflicts, quantity and destination. The resulting cabinet proposal can then coordinate the wall-mounted storage with the actual laboratory work area rather than treating the cabinet as an isolated item.
Manufacturing Head Office: No. 34 Zhenxing Road (Shengtaian Heavy Industrial Park B), Loucun, Guangming New Dist, Shenzhen, Guangdong, China
Direct Hotline / WhatsApp: +86 18126478161
Engineering Mailbox: fanalax@gmail.com