


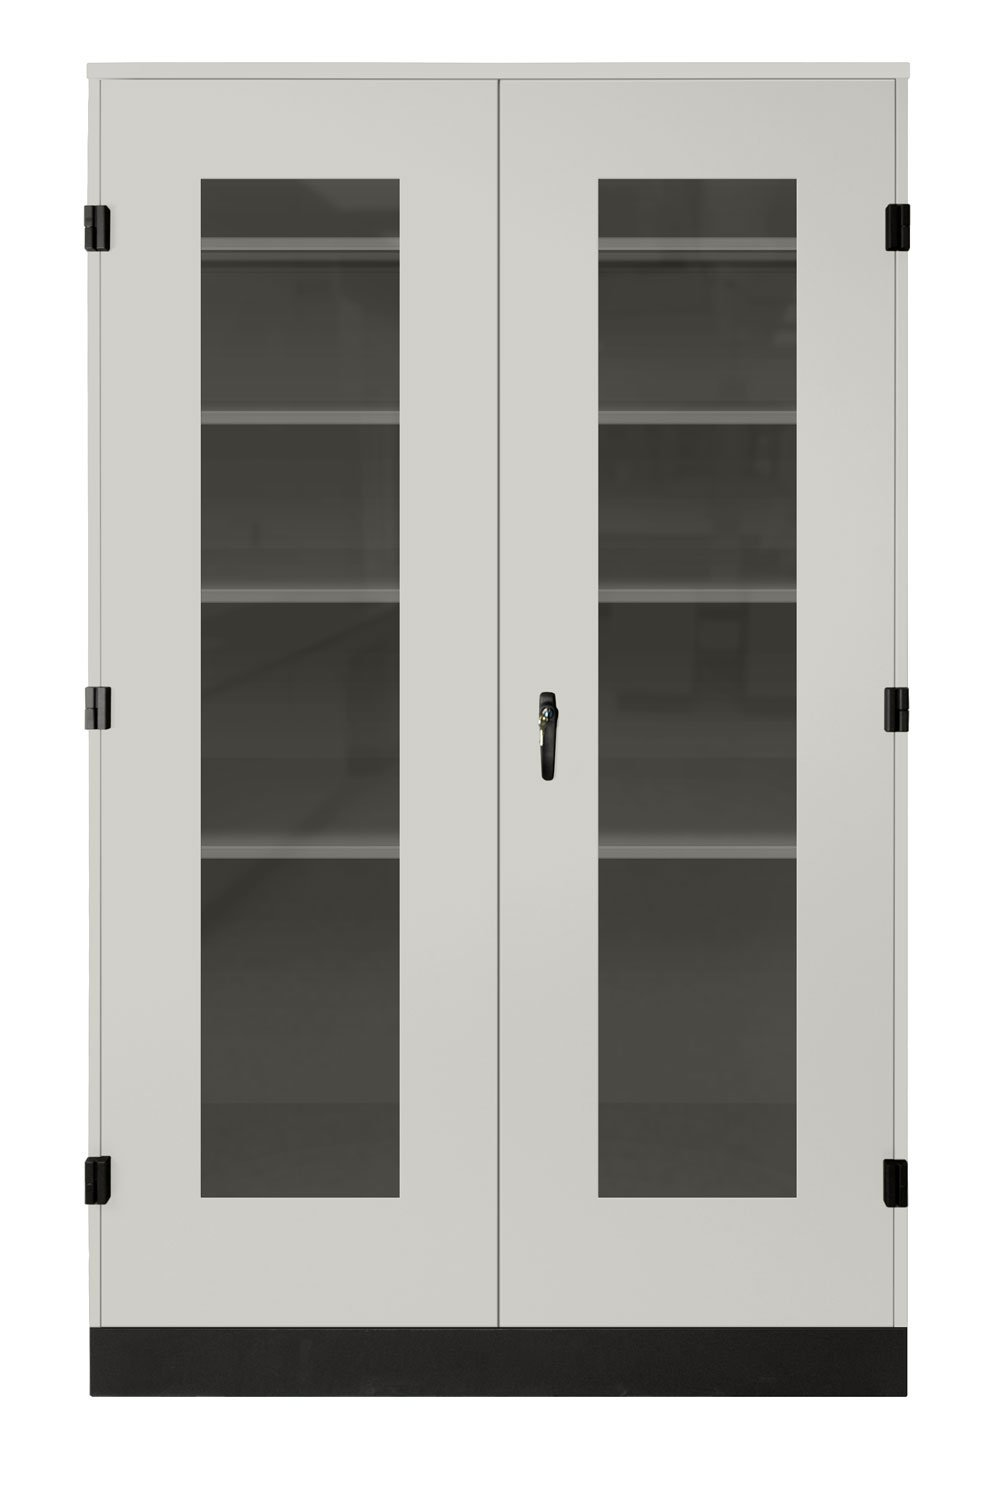
A laboratory tall cabinet provides vertical storage without consuming bench surface. It is a floor-standing full-height enclosure used where routine laboratory supplies, glassware, hand tools, files, packaged consumables or equipment accessories need a defined storage location near the work area. The cabinet can stand at the end of a casework run, form part of a continuous storage wall, or occupy a planned support zone beside a laboratory bench. Its usefulness depends on the accessible shelf space, door opening, circulation path and stability of the installed cabinet, not on its external height alone.
The first selection is whether the stored items need to be visible, enclosed, locked or reached in a narrow aisle. A solid-door laboratory tall cabinet screens ordinary supplies and can provide a full front opening when the doors are open. A glass door laboratory tall cabinet supports visual inventory without opening the cabinet. A sliding glass door tall lab cabinet reduces forward door swing in front of the cabinet, but it also limits the clear opening available at one time. Open-front storage provides immediate access but leaves contents exposed. The selected door type should follow the intended contents and the free area in front of the cabinet.
The laboratory tall cabinet must also be considered as a floor-mounted installation. Shelf layout, stored-item mass, cabinet level, anti-tip planning, wall or floor fixing, top clearance and adjacent cabinet connections should be shown on the project drawings. A tall lab cabinet may include selected shelves, locks, handles and leveling details, but those parts do not automatically establish a cabinet load limit, a security class, a hazardous-material storage function or a structural fixing arrangement. The final cabinet schedule identifies the actual configuration for each installation position.
Key Specifications and First Selection
What defines a full-height laboratory storage cabinet
A full height laboratory cabinet is a vertical storage module that stands on the floor and extends well above a standard worktop. The cabinet shell, doors or open front, shelves, back panel, selected hardware and leveling arrangement form the storage unit. The surrounding wall, floor, anti-tip hardware, wall or floor fixings, top clearance, adjacent casework and site installation are connected requirements but remain separate from the cabinet unless they are expressly included in the project scope.
This distinction matters because a tall storage cabinet changes the room in several directions at once. The width affects the length of the cabinet run. The depth affects the aisle and the door or panel movement. The height affects ceiling, lighting, sprinkler, duct and service clearance. The shelf pattern affects what can actually be stored. The installed stability depends on the selected cabinet, the items placed in it and the fixing arrangement at the site. A good laboratory storage layout records those fields before the cabinet is ordered rather than treating a full-height enclosure as a generic furnishing item.
Reference formats and first comparison
The formats below give a practical starting point for comparing tall cabinet configurations. They are reference arrangements used for space planning, not one combined manufacturing specification. The final laboratory tall cabinet is defined by the selected W x D x H, material system, front, internal layout, hardware and installation detail.
| Reference tall-cabinet format | Front configuration route | Appropriate planning use | Confirm before order |
|---|---|---|---|
| 900 W x 500 D x 1920 H mm reference format | Hinged solid doors or hinged glass doors selected for the cabinet schedule | General full-height storage within a perimeter casework run or support area | Final cabinet material, internal clear dimensions, shelf arrangement, door handing, lock, leveling and anti-tip route |
| 36 W x 18 D x 78 H in reference format | Hinged glass-door configuration | Visible storage for routine stock where a complete door opening can be accommodated | Glass and frame specification, usable opening, shelf positions, hinge direction, clearance in front and mounting or fixing detail |
| 36 W x 21 D x 84 H in reference format | Sliding glass-door configuration | Tall storage where visual access is needed but forward door swing should be limited | Effective opening width, panel overlap, track arrangement, shelf access, aisle condition, top clearance and cleaning space |
| 600 to 1200 mm width family with 350 or 500 mm depth reference routes | Open, solid-door, hinged-glass or sliding-glass layouts selected by cabinet position | Continuous laboratory storage walls with different access and visibility requirements | Final cabinet sequence, end panels, corner conditions, stored-item list, adjacent worktops and installation drawing |
The reference table should be read with the intended storage contents. A cabinet that is wide enough for a carton may still be unsuitable if the carton cannot pass through the selected door opening, cannot sit on the selected shelf, blocks other stored items or raises the center of mass too high. List the largest item height, depth and approximate mass, together with the normal access frequency. This makes it easier to set shelf positions and choose between an open, solid, hinged-glass or sliding-glass arrangement.
Inputs to confirm before a cabinet is scheduled
Start with the room elevation and floor plan. Mark the cabinet positions, cabinet widths, finished floor level, ceiling or service height, intended door movement and adjacent work surfaces. Show lights, sprinklers, ducts, service drops, electrical outlets, equipment doors and maintenance zones that occupy the space around the cabinet. A full-height laboratory cabinet should have a planned top condition rather than being selected to the maximum room height by default.
Next, define the storage duty. Record what is to be stored, the largest object size, the approximate mass per item, the number of shelves, the need for visible inventory, the need for a lock and the way items will be removed from the cabinet. Heavy items should be planned around the lower part of the storage arrangement, and the final shelf and cabinet duties must be confirmed for the selected configuration. A general statement that a cabinet has adjustable shelves is not enough to define the space or support required for a particular laboratory inventory.
Finally, identify the stability and installation conditions. The enquiry should state whether the cabinet will be a single freestanding unit, part of a connected row or adjacent to a wall bench; whether wall or floor fixings are required; and what wall and floor conditions are available. Include the desired material, door style, shelf layout, lock requirement, color or finish, quantity and destination. With those inputs, a custom laboratory tall cabinet can be configured around the room and storage needs rather than fitted into a space after the surrounding laboratory casework is complete.
Product Scope and Storage Boundary
General laboratory storage included in the product identity
A laboratory tall cabinet is intended for ordinary full-height laboratory storage. The cabinet can be configured for packaged consumables, clean containers, glassware, hand tools, documentation, small equipment accessories and other non-hazardous items that need an enclosed or visible location near the laboratory work area. The selected cabinet may use solid doors, glass doors, sliding glass doors or an open-front arrangement, together with shelves, handles, locks, leveling devices and cabinet-run components selected for the project.
The cabinet shell and its selected internal layout belong to the tall storage unit. The final specification should identify the external W x D x H, internal shelf pattern, front style, material system, finish, hardware, lock arrangement, base or leveling condition and any selected accessories. These fields determine what the cabinet is and how it can be used. They are more useful than a broad description such as “large storage cabinet,” which does not clarify whether stored items can be reached, seen, removed or returned in the installed laboratory.
The same cabinet can be part of a single storage position or a continuous casework wall. In a single position, the selection usually focuses on the stored items, door opening and cabinet stability. In a continuous run, the selection also needs to cover cabinet widths, shared alignment, joints, end panels, doors that open toward each other, top clearance and the handling route into the room. A full-height storage wall should be scheduled as a group of cabinet modules instead of assuming that separately ordered tall cabinets will align after installation.
Functions that require a different cabinet type
A laboratory tall cabinet is not automatically an instrument storage cabinet, specimen cabinet, drying cabinet, ventilated cabinet or environmentally controlled cabinet. Those functions can require defined shelf duties, electrical provisions, cable management, thermal conditions, airflow, monitoring, containment or access features that are not inherent in general laboratory casework. Where the stored equipment or material depends on any of those functions, the required cabinet should be selected around that specific duty rather than described as a variation of an ordinary tall storage unit.
The same boundary applies to chemical and safety storage. A lockable laboratory tall cabinet can manage ordinary access to routine supplies, but a lock alone does not provide a flammable-liquid, corrosive, toxic, controlled-substance or other regulated-material storage function. General solid doors, glass doors and adjustable shelves should not be used to imply fire performance, chemical resistance, ventilation, spill containment, security classification or regulatory compliance. A dedicated safety or process-storage cabinet is required whenever those properties are part of the application.
Tall storage also does not include the adjacent laboratory work surface or utility system. A laboratory countertop provides the horizontal task surface. A laboratory base cabinet provides under-worktop storage. A laboratory wall cabinet provides overhead storage above a bench. The floor-standing laboratory tall cabinet adds vertical storage beside or within the casework layout, but it does not include the worktop, sink, faucet, utilities, lighting, ducts or site installation unless those elements are separately scheduled.
Installation elements that remain project conditions
Floor leveling, anti-tip planning, wall or floor fixing, wall reinforcement, top clearance and structural site conditions must be coordinated with the selected cabinet and stored contents. A cabinet may include selected leveling provisions or fixing points, but the final installation method depends on the room construction, cabinet line, cabinet height, storage duty and project requirements. The cabinet should not be placed against a wall and treated as stable by appearance alone.
The project drawing should show the finished floor, wall conditions, ceiling or service height, nearby doors, cabinet line, adjacent equipment and required access zone. It should also identify whether the cabinet remains individual or connects to neighboring cabinets. This establishes a practical boundary between the tall storage cabinet itself and the conditions that make the completed installation stable, accessible and maintainable.
Door Styles, Visibility and Interior Access
Solid, hinged-glass, sliding-glass and open-front selections
The cabinet front determines how users see and retrieve stored items from a full-height laboratory cabinet. A solid door laboratory tall cabinet provides an enclosed visual line and can keep ordinary supplies out of sight. It is often selected for documentation, packaging, routine consumables or mixed items that do not need to remain visible. The doors need a defined hinge side and enough free space to open without striking an adjacent bench, equipment door, service post or another cabinet front.
A glass door laboratory tall cabinet allows users to identify stock before opening the cabinet. This can be useful for shared shelves containing labelled containers, common glassware or frequently checked supplies. The selected glass, frame, hinges, seals and pulls remain configuration choices. A visible front does not establish a safety, impact, dust-seal, chemical-storage or regulated-material function. Confirm the actual door and glass construction when that level of performance is needed for the storage task.
A sliding glass door tall lab cabinet can reduce the outward swing required in front of the cabinet. It is useful where an aisle, a nearby bench or an equipment position leaves limited space for hinged doors. The tradeoff is that sliding panels normally expose only part of the cabinet opening at once. Large trays, wide cartons or equipment accessories should be checked against the effective clear opening and the panel overlap. The selected track and guide arrangement should also allow practical cleaning and access during normal use.
Open-front tall storage gives immediate access to the shelf face without any door movement. It can suit high-frequency items that do not require visual screening or a lock. The contents remain exposed to dust, visual clutter and incidental contact, so the product list, shelf edge and cleaning routine should be considered before an open cabinet is chosen. A mixed cabinet line can use different front styles at different positions instead of forcing one door type onto every full-height module.
Selecting access around stored items and aisle clearance
The door style should be selected from the stored items and the space in front of the cabinet. Begin with the largest container, tray or piece of equipment that must move in and out of the cabinet. Then check the shelf height, clear opening, reach to the upper shelves, operating aisle and the direction in which a door or glass panel moves. A cabinet can appear spacious in elevation but still be awkward to use if an item cannot pass the selected front or if the user has no safe place to stand while retrieving it.
| Storage and access pattern | Suitable front style | Planning advantage | Confirm in the cabinet schedule |
|---|---|---|---|
| Routine supplies that should remain visually screened | Solid hinged doors | Enclosed front with a broad opening when doors can swing clear | Door handing, opening path, lock, shelf positions, usable internal depth and adjacent-equipment clearance |
| Shared stock that users need to identify before opening | Hinged glass doors | Visual inventory with full-width access when doors are open | Glass and frame selection, hinge direction, handles, cleaning method, shelf layout and front clearance |
| Tall storage beside a constrained aisle or work area | Sliding glass doors | Reduces forward door swing | Effective clear opening, panel overlap, track arrangement, reach behind the closed panel and cleaning access |
| Frequently used ordinary items with no need for a closed front | Open-front cabinet | Immediate shelf access and no door movement | Exposure to dust, shelf edge or restraint, stored-item list, cabinet elevation and housekeeping routine |
| Mixed laboratory storage wall | Coordinated solid, glass and open cabinet modules | Matches each storage position to its own visibility and access need | Cabinet sequence, consistent heights, end conditions, separate door movements and contents by module |
The opened-cabinet view below illustrates the relationship between a full-height enclosure, doors and interior shelves. It should be used to understand the storage form, not as a fixed shelf count, shelf duty, door hardware package or installed cabinet height.
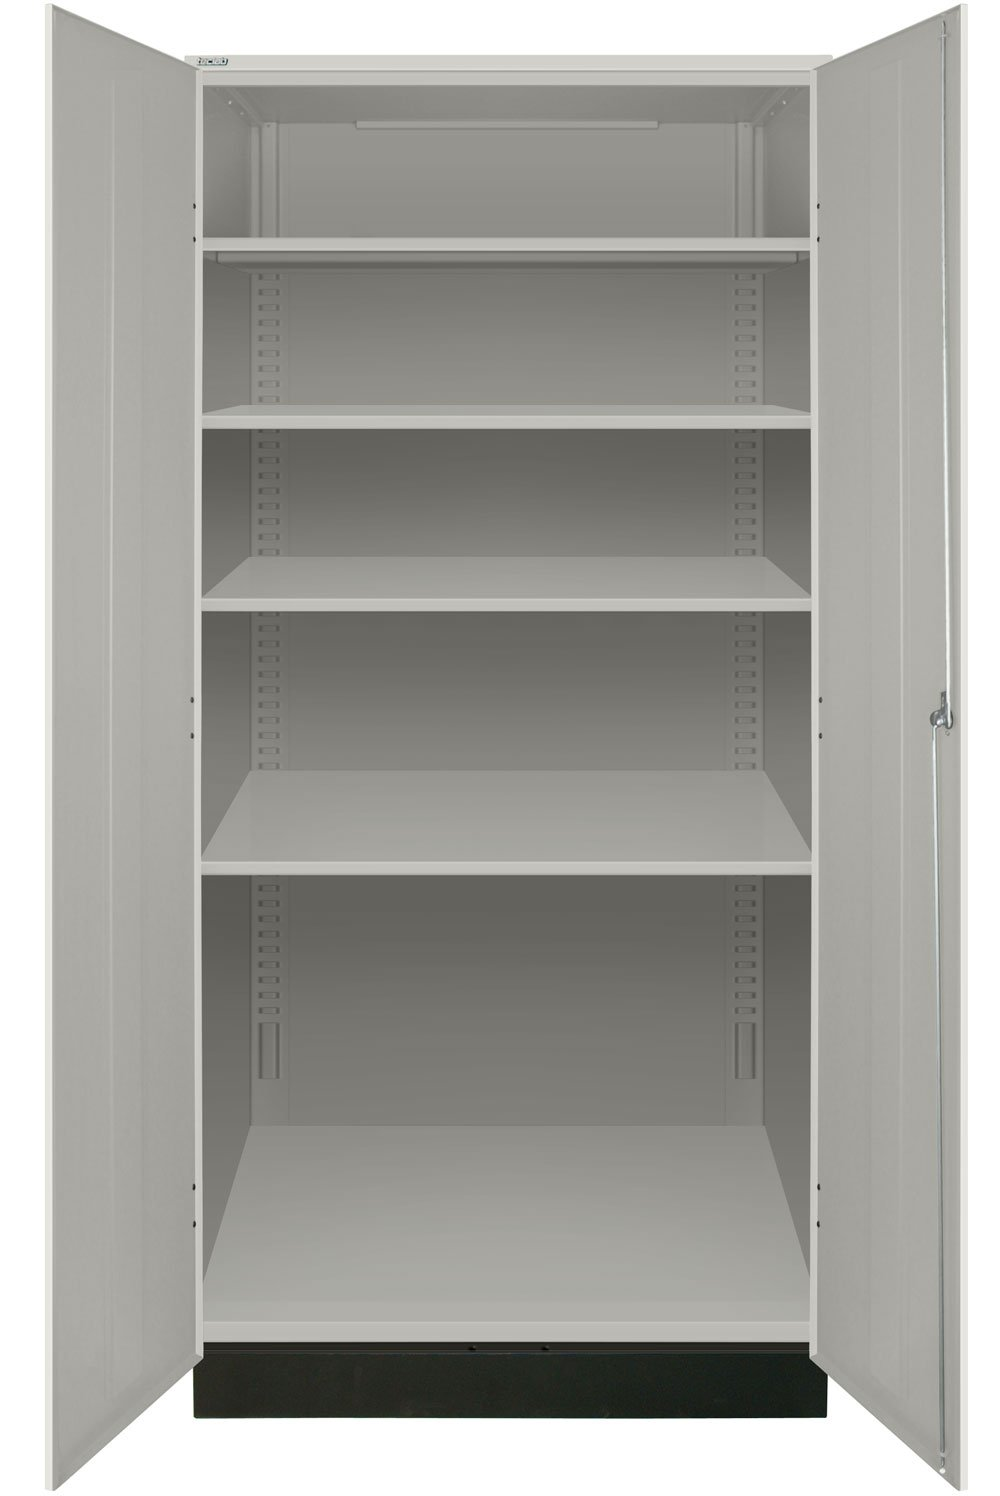
Door selection should also account for the cabinet’s position in a wider laboratory layout. At the end of a bench run, an open door can affect a corridor or block access to an adjacent tall cabinet. In a continuous wall, two neighboring hinged fronts may need different handings so that users can retrieve items without standing in the same narrow zone. Where a tall cabinet faces a laboratory island bench, the circulation distance between the cabinet and central work surface needs to remain useful during both storage access and bench work.
Cabinet Construction, Materials and Hardware
Material systems and component-level construction
The material description for a laboratory tall cabinet should identify the selected cabinet system rather than make one broad claim for every component. A selected powder-coated steel cabinet can use cold-rolled or galvanized steel elements in the shell, doors, shelves and back panel, with formed, welded or assembled details appropriate to that cabinet construction. One reference steel configuration uses 18-gauge furniture-grade cold-rolled steel, but that value belongs to the selected configuration and should not be carried into every cabinet size, panel or material option.
The cabinet body, doors, back panel, shelves, reinforcement members and exposed end panels can have different construction details. Record the shell material and finish, the front material, shelf material, back-panel arrangement, edge treatment and the visible end conditions for the chosen cabinet. This gives a project team a usable description of the tall cabinet rather than a vague statement about a metal storage enclosure. It is particularly important for a continuous cabinet wall, where different tall modules must align while still meeting their own storage and access needs.
Stainless steel, compact laminate, phenolic and other casework materials should be selected as distinct construction systems. A stainless steel laboratory tall cabinet may be considered where a project has a defined cleaning, moisture or exposure requirement, but the alloy, surface finish, weld treatment, component thickness and hardware still need to be identified for the selected unit. A laminate-faced or phenolic construction has its own panel core, edge, joint and fastening details. It should not inherit the material claims of a steel cabinet simply because the external dimensions or door style are similar.
Shelves, handles, locks and selected internal accessories
An adjustable shelf laboratory cabinet needs an interior arrangement that matches the actual contents. Reference full-height configurations may use four or five adjustable shelves, but the number of shelves, adjustment positions, spacing, shelf supports, useful internal height and shelf duty must be selected for the scheduled cabinet. The largest stored item, its approximate mass and the height at which it will be accessed are all relevant. Tall cartons, boxed equipment, glassware trays and compact containers can require very different shelf layouts even within cabinets of the same external size.
The total storage plan should separate shelf duty from cabinet stability. The items on one shelf, the distribution across all shelves and the completed cabinet installation are different conditions. A cabinet row should not be described as suitable for heavy storage unless the selected shelves, cabinet structure, item distribution and installation arrangement have been specified for that use. Place heavier items in the lower storage zone where practical, and reserve the upper shelves for objects that can be reached and handled safely in the installed location.
Handles, hinges, sliding tracks and locks are equally important to daily use. A lockable laboratory tall cabinet may use a selected handle and key arrangement to manage routine access, but a lock does not create a hazardous-material or high-security storage classification. Specify the door type, hinge or track route, handle profile, lock requirement, key management, door restraint and any soft-close or closing detail that matters to the laboratory. If a cabinet includes a clothing rail, pull-out accessory, drawer, bin or internal divider, list that component separately with its position and intended use.
The handle view below illustrates one lockable cabinet-hardware form. It does not define the selected lock type, number of locking points, access-control level, chemical-storage function or the front construction of every laboratory tall cabinet.
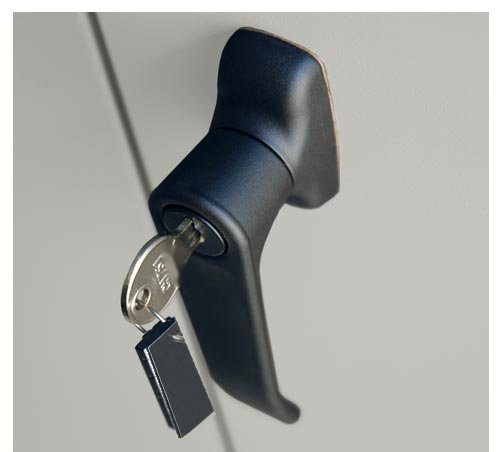
For an accurate cabinet schedule, document the material system, finish, shelf number and positions, door construction, hinges or tracks, handles, locks, internal accessories and the stored items planned for each module. This makes a full-height laboratory storage cabinet easier to compare, install and use without converting a general casework cabinet into an unsupported specialised storage claim.
Leveling, Anti-Tip Planning and Installation
Stability, fixing and top-clearance coordination
A laboratory tall cabinet is a floor-standing full-height enclosure, so its installed stability must be planned before the cabinet is delivered to the room. The cabinet dimensions, shelf pattern, stored-item distribution, floor condition, wall condition, leveling arrangement, anti-tip provisions and selected fixing method all affect the completed installation. The cabinet should not be treated as stable simply because its front looks level or because it is placed against a wall. Leveling corrects the cabinet position; it does not by itself define the anti-tip or structural fixing arrangement.
The project should identify whether the cabinet is installed as an individual unit, connected into a continuous row, or positioned beside a wall bench or equipment bay. Each situation may change the available fixing locations, the need for cabinet-to-cabinet connections, the end-panel condition and the sequence in which the cabinets are set and aligned. A tall cabinet may have selected leveling devices or designated fixing points, but wall or floor anchors, reinforcement and installation responsibility must be agreed for the selected cabinet and the actual building condition.
Top clearance is a separate planning field. Full-height cabinets can conflict with ceiling grids, lights, sprinklers, ducts, cable trays, service drops, access panels or sloped construction even when the nominal room height appears sufficient. Mark the cabinet top elevation and the clearance above it on the drawing. Leave adequate access for installation and adjustment, and avoid positioning the cabinet where a door, top panel or fixing point becomes unreachable once other casework or equipment has been installed.
Tall-cabinet runs, handling route and final installation inputs
The installation plan should begin with the room layout rather than the cabinet elevation alone. Check the delivery path from the unloading point to the final room: gate, door, corridor, lift, stair, turn, temporary protection and the available space for standing the cabinet upright. A full-height module that fits in the final room may still be difficult to move through the building or safely position below ceiling services. When a cabinet line contains several modules, set the reference datum and installation sequence so widths, end panels, joints and door clearances are resolved as the run is assembled.
| Installation input | Why it affects the tall cabinet | What to provide | Coordination action |
|---|---|---|---|
| Finished floor level and cabinet position | Sets the cabinet base, leveling range and alignment with nearby casework | Floor plan, finished floor condition, cabinet tags and target top elevation | Establish a common datum for each tall cabinet and adjacent cabinet run before the units are positioned |
| Wall, floor and reinforcement condition | Determines how the planned stability and fixing arrangement can be implemented | Wall and floor construction, available fixing zone, reinforcement locations and concealed-service information | Coordinate the selected anti-tip and wall or floor fixing method with the building condition |
| Stored items and shelf layout | Changes cabinet center of mass, shelf access and practical use | Item list, largest item dimensions, approximate mass, shelf positions and access frequency | Place heavier contents lower where practical and select shelves and installation detail around the storage duty |
| Top clearance and building services | Full-height cabinets can conflict with sprinklers, lights, ducts, cable trays and access panels | Ceiling or service elevation, cabinet top height, required clearance and maintenance zones | Confirm cabinet height, top treatment and placement before delivery or final cabinet-run layout |
| Door movement and circulation | Hinged doors and users retrieving stored items occupy the aisle in front of the cabinet | Door handing, opening path, aisle width, adjacent benches, equipment doors and emergency-route constraints | Check open-door positions and access routes with the completed room layout, not a bare floor plan |
| Delivery and installation route | Large modules need a viable path and sequence to reach the final position | Door, lift, stair and corridor dimensions; site restrictions; handling method; installation order | Plan module size, protective measures and installation sequence around the actual route into the laboratory |
Cabinet runs need the same attention to front alignment as to structural coordination. Different door styles, depth routes and end conditions can make a continuous storage wall look coherent while still leaving enough clearance for each cabinet to function. A row can combine solid, glass and open tall cabinets, but the cabinet widths, heights, top panels, end fillers and opening paths should be set on an elevation rather than adjusted during installation.
For a project-ready quotation, include the W x D x H and quantity for each cabinet tag, desired material and front type, shelves and stored items, lock requirements, floor and wall construction, top-clearance information, anti-tip or fixing requirements, cabinet-run layout, delivery path and destination. This enables the laboratory tall cabinet to be configured for the room conditions and installation sequence instead of being selected only from a front-view image.
Applications, Related Products and Selection Boundary
Suitable locations for full-height laboratory storage
A laboratory tall cabinet is useful where a laboratory needs storage volume above the height available in under-worktop or wall-mounted units. Common positions include the end of a perimeter bench run, a support wall near a preparation area, a storage niche outside the active instrument envelope, or a continuous wall of casework containing several cabinet modules. The cabinet should keep routine items near their point of use without consuming the surface needed for testing, preparation, documentation or equipment operation.
The most suitable contents are ordinary laboratory supplies that can be stored safely in the selected internal arrangement: labelled containers, packaged consumables, general glassware, cleaning tools, manuals, spare non-hazardous accessories and small equipment items. The cabinet can be configured for visible stock, enclosed stock, locked routine storage or rapid open access. The correct configuration follows the stored items and access pattern. A tall cabinet with glass fronts can help users locate shared items, while a solid-door cabinet can screen mixed supplies in a clean laboratory elevation.
Full-height storage should be positioned so an open door, sliding panel or user standing at the cabinet does not block a critical route. A tall laboratory cabinet beside a busy entrance, a frequently used equipment door or an emergency passage may need a different front style, a different location or a cabinet width that changes the overall storage-wall arrangement. The goal is not only to fit more volume into the room, but to keep stored items reachable without compromising the work area around the cabinet.
Related casework in a coordinated laboratory elevation
A laboratory tall cabinet is normally one component of a wider casework system. A laboratory base cabinet provides storage below the worktop and helps establish the working height. A laboratory countertop supplies the task surface and can carry a sink, equipment or service interface. A laboratory wall cabinet provides overhead storage above the worktop. The tall cabinet provides the floor-standing vertical storage zone, often at one end of the same bench elevation or along a nearby wall.
The relationship to the bench layout is equally important. A laboratory wall bench can use tall cabinets at the ends of a perimeter run or within a dedicated wall-storage zone. A laboratory island bench normally remains clear of the wall cabinet line, but the aisle between the island and a tall cabinet should allow both bench work and cabinet access. Showing all of these elements on one floor plan and wall elevation helps avoid a cabinet door or operator movement encroaching on the central work zone.
Each related item should keep its own configuration fields. The tall cabinet needs its W x D x H, door type, shelves, lock and installation planning. The base cabinet needs its front and under-worktop storage arrangement. The worktop needs its material and equipment openings. The wall cabinet needs its overhead mounting route. Combining those specifications into one generic “laboratory storage” description makes a quotation less precise and can leave important site interfaces unresolved.
Storage functions that should remain separate
General full-height casework does not replace a specialised storage product simply because the cabinet has doors, shelves and a lock. Use a purpose-designed cabinet where the application requires flammable-liquid storage, corrosive chemical storage, toxic or controlled-material storage, ventilation, spill containment, fire performance, environmental control, drying, sample preservation or a defined security classification. Those functions involve distinct materials, construction, testing, equipment or installation requirements that are not created by selecting a taller ordinary cabinet.
Instrument storage also deserves separate consideration. A tall laboratory cabinet can store non-hazardous equipment accessories or inactive instruments when the selected shelves and internal dimensions are suitable. It should not be called an instrument storage cabinet where the equipment requires a specific shelf duty, shock protection, power connection, ventilation, temperature condition or cable route that has not been scheduled. The same restraint applies to specimen, glassware-drying and chemical-storage terms. Clear boundaries make the laboratory tall cabinet easier for buyers to select correctly and make the final cabinet schedule more dependable.
Frequently Asked Questions
What is the difference between a laboratory tall cabinet and a laboratory wall cabinet?
A laboratory tall cabinet is a floor-standing, full-height storage unit. A laboratory wall cabinet is mounted above a worktop and uses the wall as its support location. The tall cabinet provides vertical storage from floor level upward, while the wall cabinet preserves the floor zone below the worktop. Select the two cabinet types from available room space, stored items, access height, wall conditions and the desired casework elevation.
Which door style should be selected for a laboratory tall cabinet?
Use solid doors for enclosed ordinary storage where visual screening is useful. Use hinged glass doors where users need to identify contents before opening the cabinet and enough forward clearance is available. Use sliding glass doors where visible storage is needed but outward door swing must be limited. Use an open front for high-frequency ordinary supplies that do not require a closed or lockable front. Confirm the actual door opening, panel overlap, handles, locks and shelf access with the selected cabinet.
Are the listed 1920 mm, 78 in and 84 in sizes fixed specifications?
No. Those formats are reference cabinet arrangements used to establish full-height laboratory storage dimensions. The final W x D x H, internal shelf space, door opening, material, finish and installation condition must be selected for the scheduled cabinet. A reference height does not by itself establish top clearance, delivery access, anti-tip planning or compatibility with the ceiling and services in the room.
How many shelves does a tall lab cabinet include?
The shelf count and shelf positions are selected for the cabinet configuration and the intended contents. Reference full-height cabinets can use four or five adjustable shelves, but that does not establish a universal arrangement or shelf duty. Provide the largest item dimensions, approximate item mass, desired shelf spacing and access frequency so the internal layout can be configured around the actual laboratory inventory.
Can a lockable laboratory tall cabinet store chemicals or controlled materials?
A selected lock can manage ordinary access to routine laboratory supplies. It does not turn a general full-height laboratory cabinet into a flammable-liquid, corrosive, toxic, controlled-substance or other regulated-material safety cabinet. Where the stored items require fire performance, chemical resistance, ventilation, spill containment, defined access control or another specialist function, select the appropriate purpose-built storage cabinet for that material and application.
What installation information is needed before ordering?
Provide cabinet dimensions and quantity, wall and floor conditions, ceiling or top-clearance information, cabinet position, adjacent casework, desired door type, shelf layout, stored-item list, lock requirement and the intended anti-tip or fixing approach. Add the delivery route through doors, corridors, lifts or stairs when the cabinet is large or the building access is restricted. A floor plan and wall elevation help coordinate the cabinet with benches, equipment and services before the final configuration is set.
Contact the Xicheng Engineering Team Today
Send the laboratory floor plan or wall elevation with the required cabinet width, depth and height, selected solid, glass, sliding-glass or open front, shelf and stored-item requirements, material and finish, lock requirement, wall and floor conditions, top clearance, cabinet-run layout, quantity and destination. The resulting proposal can coordinate the full-height storage cabinet with its access, stability and installation conditions rather than treating it as a standalone storage box.
Manufacturing Head Office: No. 34 Zhenxing Road (Shengtaian Heavy Industrial Park B), Loucun, Guangming New Dist, Shenzhen, Guangdong, China
Direct Hotline / WhatsApp: +86 18126478161
Engineering Mailbox: fanalax@gmail.com